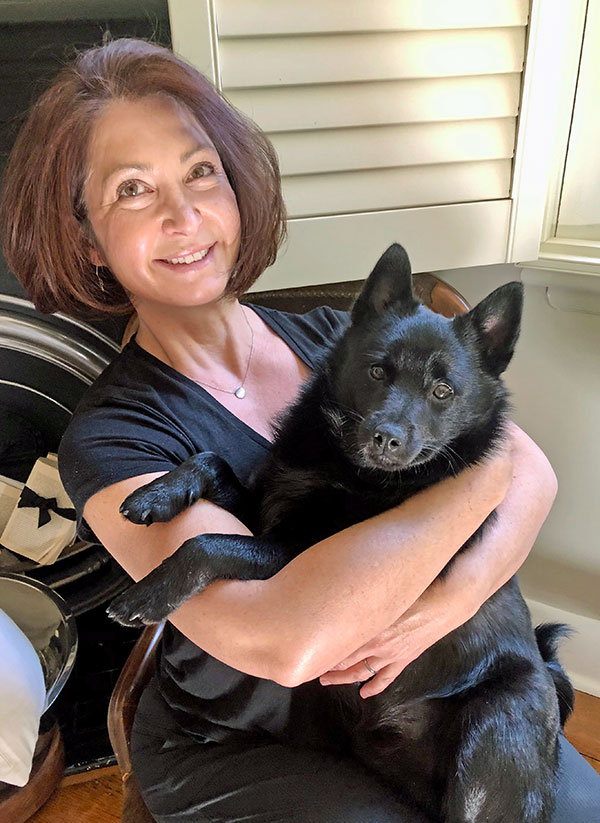
Kylie with Rémy, her 18 month old Schipperke.
Kylie is just starting her cheesemaking adventure, thanks to the gift of a workshop she attended last summer. Her story reminds us that workshops make the best gifts for aspiring cheesemakers. (As a bonus, after the workshop, the giver becomes the happy recipient of homemade cheese!)
Kylie’s Story
I live with my family in Melbourne, Victoria, Australia – my husband Andrew, our 2 teenagers, Felicity (18) and Fergus (14), as well as our Schipperke, Rémy (my fellow cheese fiend) and our Burmese cat, Charlotte.
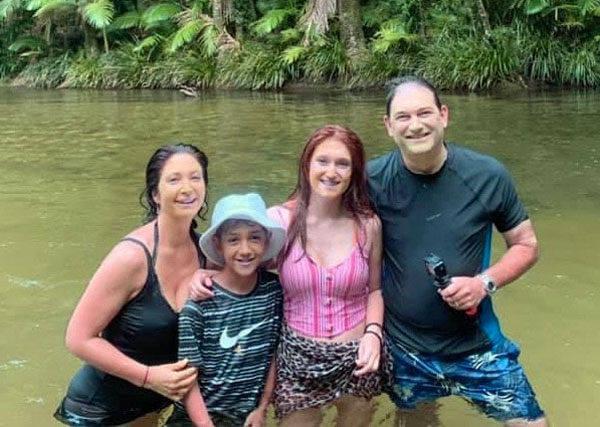
Here we all are in far North Queensland in the Daintree Rainforest on a stand-up paddle board afternoon (faces with “natural mud packs”). March this year.
I love cheese and simply can’t live without it, especially since I’ve learnt to make my own.
I love the process. I think it’s a home and a channel for my inner “creative.” Or, maybe it’s just a love to discover something new and delicious (that I can eat!).
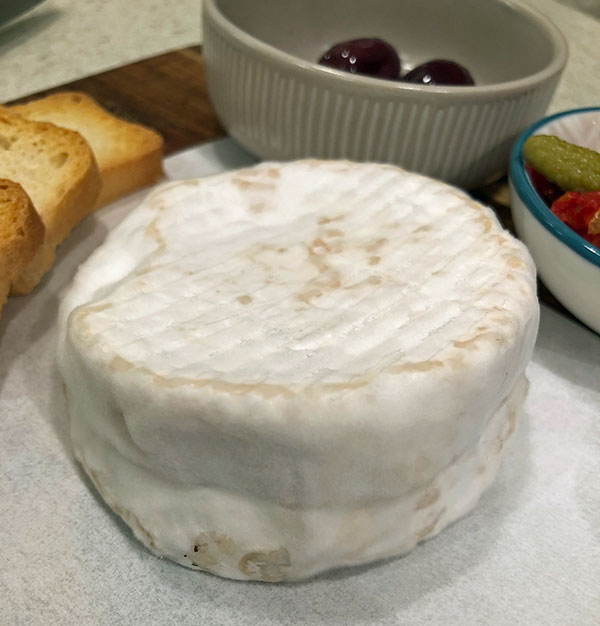
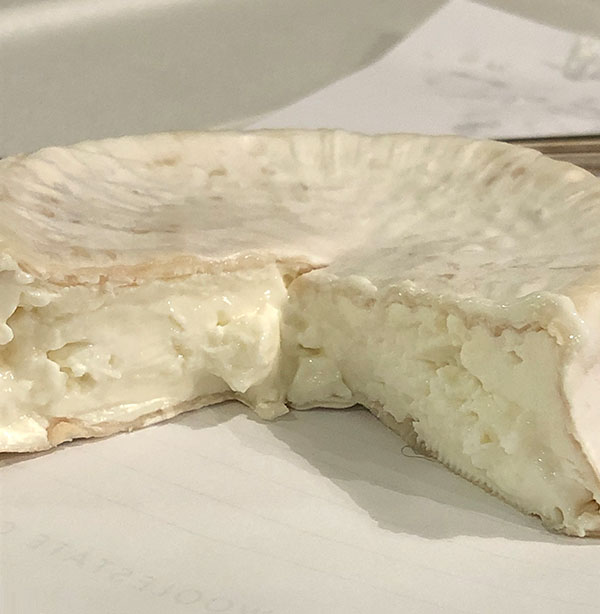
My most recent goat Brie.
A new recipe comes with sweet anticipation. I love not knowing what to expect – it’s a bit unknown yet but the recipe promises something delicious to share with the people I love (Rémy included).
Yet, I’m honestly not far out of baby steps. For someone who’s loved cheese since she could crawl, and who’s only ever bought the stuff, to now be able to make it in my very own kitchen, experiment with it, unwrap it and enjoy it with my people, is a true thrill.
As a child, we lived on several acres on the King Parrot Creek.
Anyone who knows about blackberry bushes probably has some idea about how rampant they are, and while they’re alive, nothing else has a chance in the soil.
So, that’s where our goat Tessa (pictured here) came in. Goats will eat almost whatever they can, including socks and shirts on the clothesline. They can also tolerate prickle bushes, and from memory, Tessa devoured her way through vast clumps of blackberry bushes.
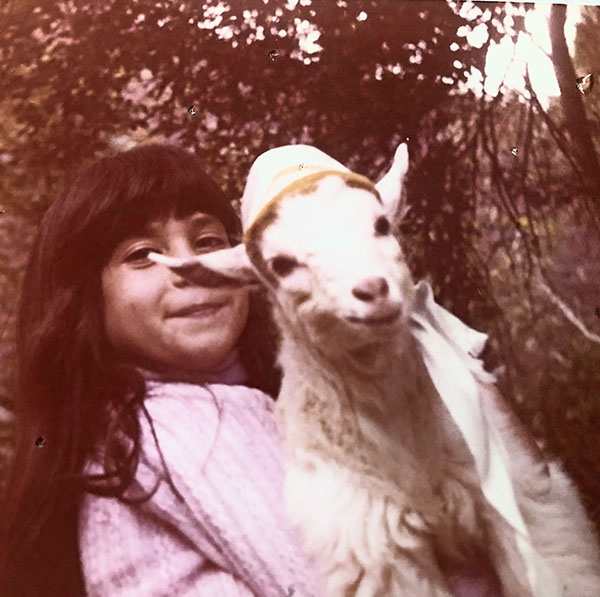
Our goat Tessa (in bonnet with blue ribbon) and I. Circa 1978
How I got started:
I’d never considered making my own cheese until Andrew gave me a beginners cheesemaking course for Christmas a couple of years ago.
Covid hit and it got postponed over endless Melbourne lockdowns (Melbourne was the “global capital” for lockdowns).
Anyway. The course finally went ahead this June. A 2-day immersion, truly comprehensive with no detail left out. It was run by Graham Redhead, who travels to Australian cities to teach his craft. (Cheesemaking – Cheesemaking Courses).
We learnt about essential hygiene practices, temperature control, how to cut, stir and hoop a range of cheeses – all of which we got to take home to enjoy.
Brie was my favorite and I have since made it many times. We also made – Greek feta, soft creamy feta, mozzarella and cheddar. The mozzarella was a tricky one, I think, because of the winter weather which may not have helped with our yield. But, the feta was so easy by contrast – very forgiving and simply delicious.
The standout cheese for me was the technically demanding Brie which I ended up ageing at home for 3 whole months and, goodness, it was worth every moment.
So, it was this introductory course which fueled my passion and appetite to plough on, consolidating my skills and finding my feet. Since then and many yields later, my confidence has bloomed and cheesemaking now stands as my favourite hobby, worth all the toil.
Most recently:
I enjoyed Cheesemaking 2 in early October. This course runs for people with some cheesemaking experience. It was another 2 day immersion, this time learning how to produce the wonderfully complex hard cheeses like blue and Parmesan.
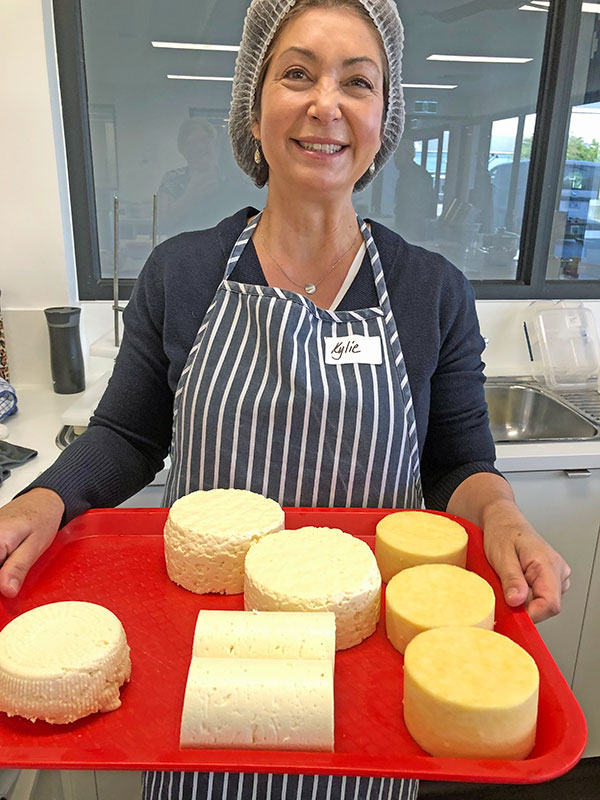
Me at Cheesemaking 2.
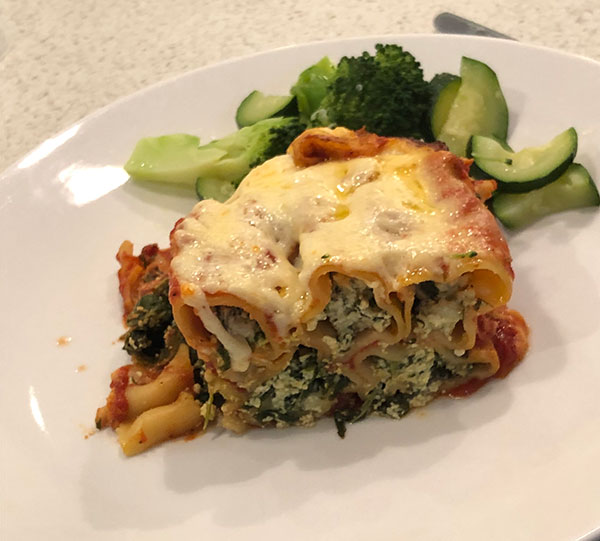
Like the first, this was another 2-day immersive blast of fun. We made blue vein, Comte, halloumi, a washed rind cheese and a whey ricotta (which went into my latest feta and spinach cannelloni, shown below).
We also made cultured butter, something that’s sure to be made again and again in our butter obsessed home.
Many of the cheeses I made at the class will mature over the days – some, weeks ahead in my trusty cheese cave – aka the Australian ESKY (ice box). Just add frozen ice bricks and change daily.
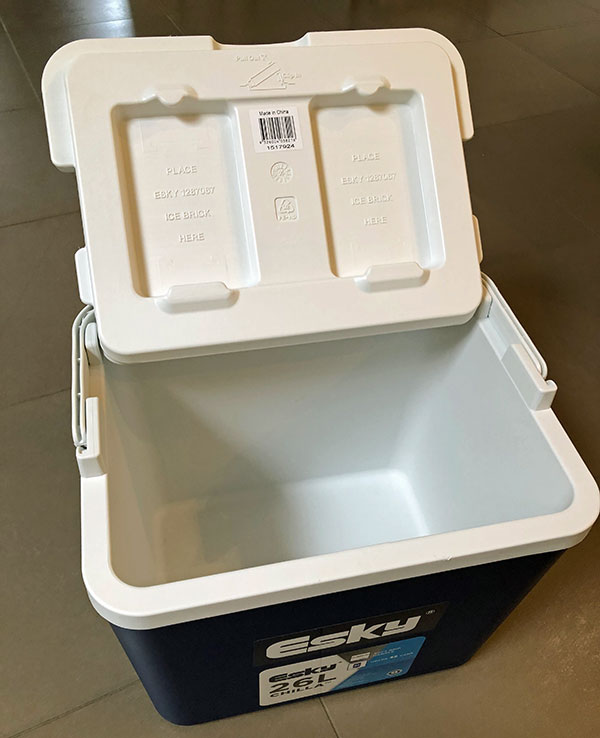
My cave.
My first blue at 5 weeks. The texture is soft and smooth as opposed to a harder, crumblier version. We learnt that to make a softer cheese, we keep our ‘cuts’ at the curd stage quite large. To achieve a crumblier version we would cut the curd into smaller cubes. On taste, I’d describe this blue as ‘smooth and pungent’ with a distinct earthy after taste. A good first blue. Goes well with a Pinot Noir.
My ongoing hobby:
My best local spot for milk is a delicatessen-type supermarket called Leo’s where you’ll find endless quality products from foie gras to chutney to chocolate from anywhere in the world. Their product range is exquisite. Milk direct from a dairy would be ideal, and my next thing to try.
I’m slowly building my range and repertoire of equipment and ingredients. Recently, I received my large pyramid mould from England and I can’t wait to make the tantalizing Monte Rosso which was featured on your site (cheesemaking.com) a little while back.
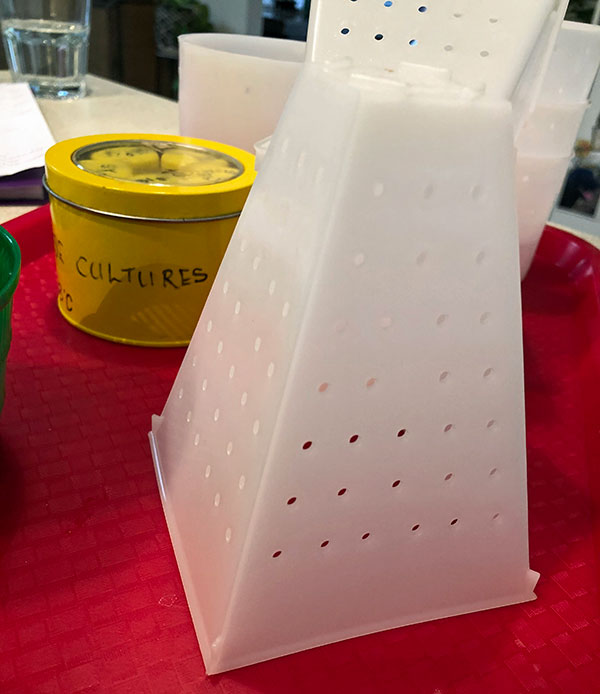
Mould for next cheese project “Monte Rosso” featured on your site a while back.
I love making the cheeses I’d only ever purchased from the supermarket. Basic ricotta, for instance, is the one that goes into our favourite family dish – spinach and ricotta cannelloni. It’s so satisfying knowing that the only store-bought ingredient in this delicious dish is the cannelloni tubes!
I frequently make a range of soft cheeses including Persian feta and Brie. And, as an addict of the rich, deep, earthy goat cheese flavours, (and perhaps stemming from a childhood love of goats), experimenting with this delicate milk is pure pleasure for me.
Brie, ripe and ready for the cheese board.
I’ve been experimenting with adding tapenades and truffles to goat Brie, adding these midway through cave ageing, and watching that fluffy “geo”mould re-envelop that scrumptious goodness over the remaining days.
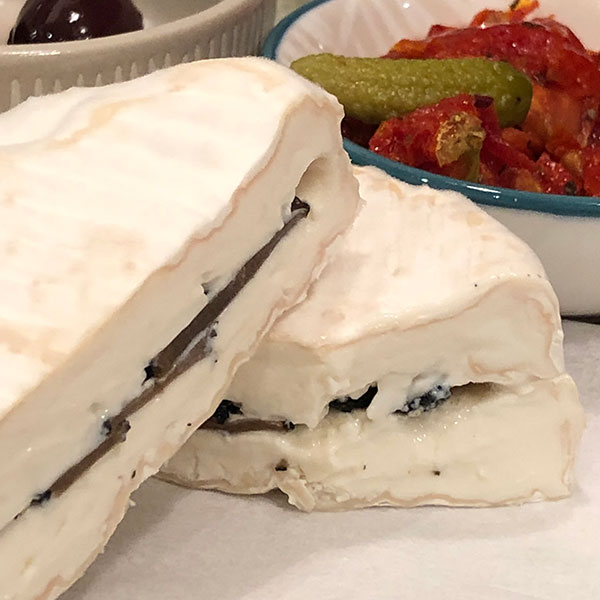
Brie with truffle slices in the centre, added at day 7 in the cave and allowed a further 6 days.
I enjoy making Chabichou/Persian feta – so easy, and delicious, when beautifully packaged up in glass jars as gifts with different colours of herb and spice combinations.
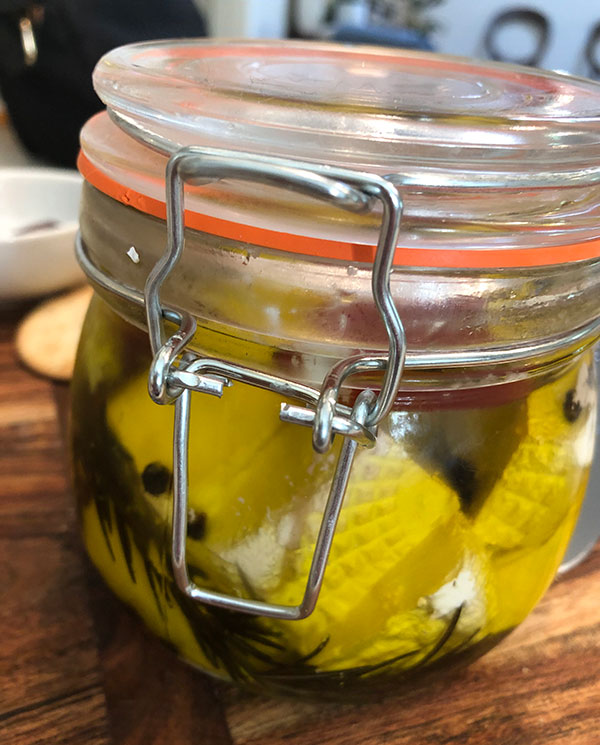
Here’s a Persian feta marinated in olive and canola oils with peppercorns, rosemary and chilies. Wonderful on a peppered water cracker, or given to someone special as a gift.
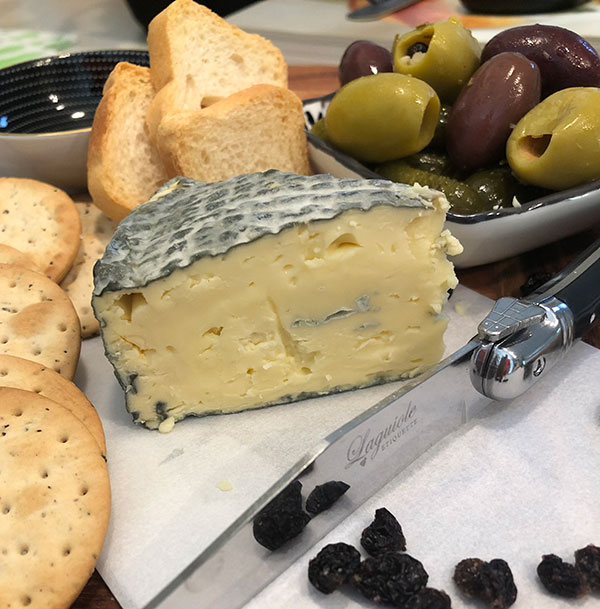
Over a recent cheese board, we cracked open the first farmhouse cheddar I’d made at the course in June. It had aged for only 3 months, but it’s smooth and creamy texture and round, delicate flavour was a delicious surprise.
Other hobbies:
Silver:
When I’m not making cheese, I enjoy silversmithing. I’m relatively new to it but at 51 – I reckon it’s better late than never to take time for those tactile interests I’ve held forever, and dive into what’s truly mindful and creative for me. 😁
Some years ago I learnt how to craft a silver ring from a length of silver wire – working it through a process of heating (annealing), bending, soldering, refining and polishing to create a beautiful brilliance that only silver can produce.
This year I’ve returned to this mindful, immersive craft and right now I’m learning the art of wax carving.
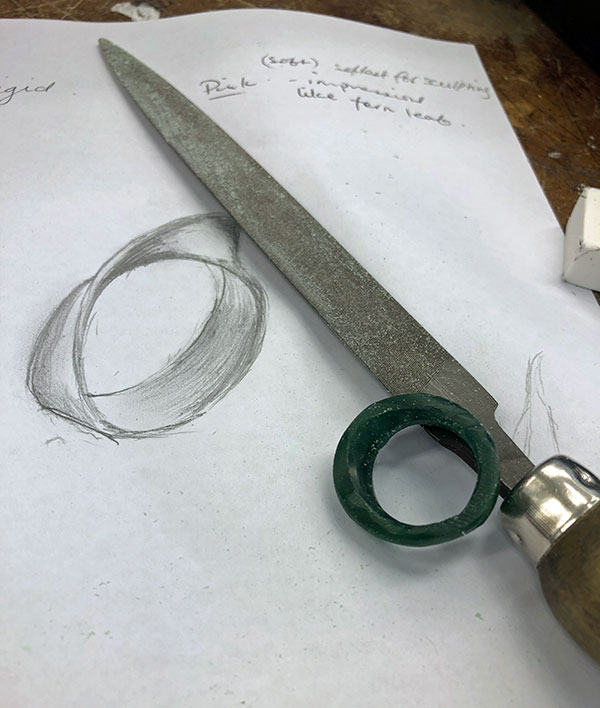
A sketch of this project – a silver ring inspired by Georg Jensen.
The large file will help with first carvings before smaller ones and other implements help to refine the design.
The ring will be formed using wax casting; the process of carving the design first in wax (here, dark green) which is then cast into a plaster mould, baked at over 650C to achieve the firmest mould that will then take molten silver to produce the final form.
This design is quite an optical illusion, and my first cast was a fail. I’m now on my second chunk of wax and determined to get there!
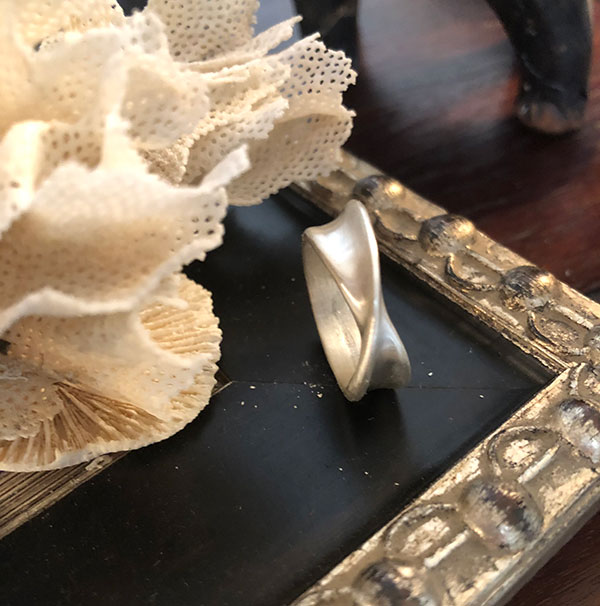
Here’s an image of the ring after the casting process.
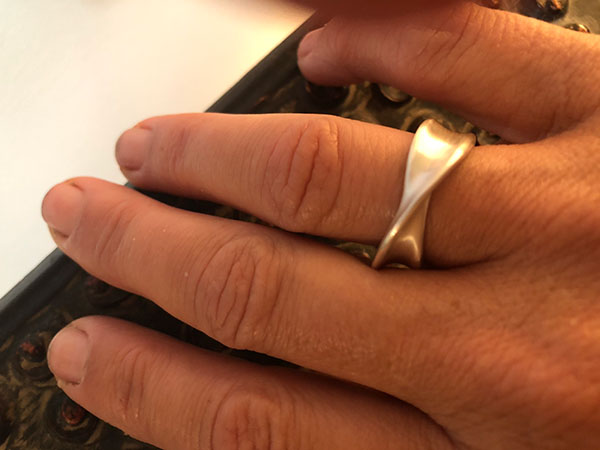
It’s still a work in progress with more polishing and refining to go, but so far, I’m thrilled with how it’s coming together.
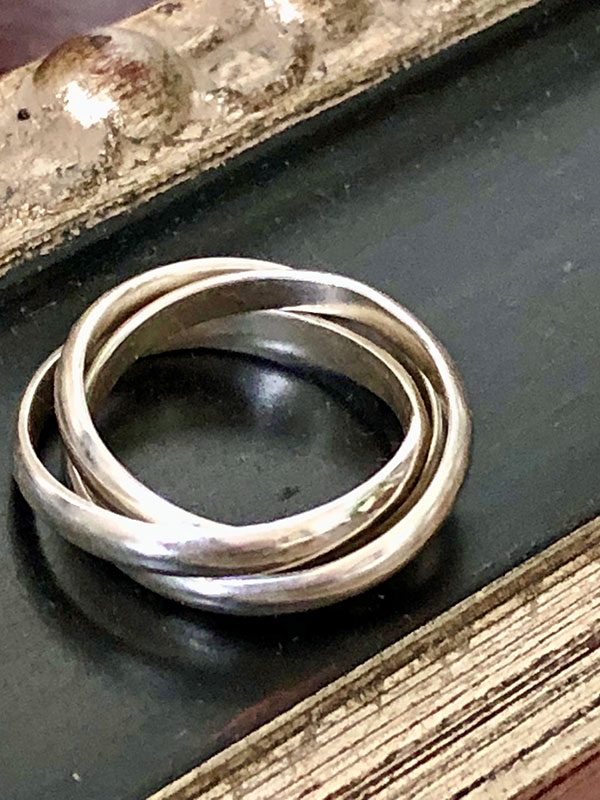
Below is a Russian wedding ring I made earlier this year. Unfortunately, my soldering practice at the time left the piece a little too small for the finger! So, I love wearing it on my favourite silver box chain:
My Schipperke:
The Schipperke breed originates in Belgium. These feisty, energetic, intelligent little dogs were used to guard barges on canals in Belgium back in the 1700 and 1800s. Schipperkes were also used by the shoemakers to take care of rats and mice in their workshops.

Rémy is wickedly obsessed with cheese and always knows when the cheese board’s up!

I really enjoy all the articles about cheese making but my problem is the cave . I’ve tried a fridge but have trouble with the temperature and humidity. I played around with it all but gave up. Please please can anyone help as I love making cheese but now have a fear of the cave!!!
You’re not alone, Pamela. But there are easy solutions. Some people actually do all their aging in styrofoam coolers!
We sell a thermostat for converting a fridge to a cave – https://cheesemaking.com/collections/aging/products/refrigerator-thermostat
We’ve also posted several articles about making caves through the years. Here are a few:
How to Make Special Containers for Aging Cheese – https://blog.cheesemaking.com/how-to-make-special-containers-for-aging-cheese/
How to Make an Inexpensive Cheese Cave – https://blog.cheesemaking.com/make-inexpensive-cheese-cave/
Tatiana’s Refrigerator Cave – https://blog.cheesemaking.com/tatianas-refrigerator-cave/
Using a Coolbot in Your Cheese Cave – https://blog.cheesemaking.com/using-coolbot-cave/
Controlling Moisture in the “Cave” – https://blog.cheesemaking.com/humidity/
Controlling Humidity in Your Cheese “Cave” – https://blog.cheesemaking.com/controlling-humidity-in-your-cheese-cave/
How to Make a Cheese Cave – https://blog.cheesemaking.com/how-to-make-cheese-cave/
Excellent suggestions Jeri. So many options that leave only one question::what cheese will I make first? 😉
Personally the simplest solution (and actually the only one I’ve used) is the portable cooler (the type you’d take on a picnic, for example). In Australia we call it the Esky. Frozen ice bricks (essentially plastic blocks with fluid inside ) are rotated in and out of the box to keep the temp steady)
The thermostat controller is easy and fail safe. (in Australia the Inkbird is a common choice) It modifies the fridge’s temperature, turning it on and off according to your set temp. Takes out the toil of changing ice bricks.
Wine fridges are another option as these operate at a range of temperatures suitable for cheesemaking. Yes, up you go in price, but it’s an easy solution to achieving the temperature you need and keeping it there.
so many options. Give it a go and you’ll ask why didn’t I start sooner!
😋
Thank you, Kylie! In case you missed her interview – https://blog.cheesemaking.com/kylie-carnegie-in-melbourne-victoria-australia/
I picked up a smallish wine fridge with a glass door, which allows me to see the temperature and humidity without opening the door, The fridge cost me AUD100 second hand, and the thermometer/hydrometer about AUD15 (online). It is still not perfect, but the cheese is getting better each time – and is always edible 🙂 [Australia]
Hi, Remy…
I really enjoyed your article. Your journey sounds ever so familiar! I am wondering if you could share a little more info on the ash-covered creamy blue you made. Looks so beautiful! Do you pierce it, or just let the blue form without. And I love the idea of adding layers of goodies in the brie. You are really creative with the recipes, which I really admire!
Take care…please keep us posted of any of your other creations!
I also have a story…maybe you could ask Jeri to share it with you.
Cheers! Rebecca Noble
Rebecca’s interview – https://blog.cheesemaking.com/rebecca-noble-in-pittsburgh-pennsylvania/
BTW, there are over 1000 articles available on the blog if you do a search.
So very sorry I got your name wrong, Kylie! But the intent was there.
Rebecca Noble
No problem. Love the name change 😉
Hi Rebecca
Thanks for your interest and comments!
The blue cheese (no ash, just mould) was made with full cream milk 6 litres (1.32 gallons). Plus 600ml (20 fluid oz) of cream to achieve a creamy texture.
At the cutting stage, cubes were 15mm (a drier, crumblier texture calls for much smaller cuts than this). My preference is a creamier result, and the 15mm cuts produced just that.
Piercing commences Day 7. Re-piecing at Day 10. I used a wooden skewer and made holes 1cm apart across top and sides of the cheese. I also ensured that the holes ran through to the other side to ensure oxygen where it’s needed.
The cheese was then turned 2-3 times weekly for 2 further weeks, then once weekly for a further 2 weeks. I pierced the cheese only at Day 7 hence little mould inside. Next time I might try being a little more liberal.
It’s a beautiful cheese – very ‘farmyard’ in flavour, with a creamy smoothness that sends you back to the cheeseboard for more. Beautiful with a dried apricot or fig.
Kylie x
Thanks so much, Kylie…for your detailed response! I thought sure it was ash on the rind. Shows I still have lots to learn! I have not been successful making blues. I have made maybe a dozen or so recipes and have not been happy with the flavor profiles of any of them. Now I have a new goal…to try to reproduce your beautiful Blue. Thanks for the inspiration…
Happy Cheesing!!
Rebecca
Us Aussies seem to easily get hooked on cheesemaking. 🧀🧀
I love making them too though get a little frustrated at times due to a failure. But it doesn’t stop me.
Keep enjoying.
Failings are learnings, Kathy. Persistence gets its sweet reward!
Looks like you’re way beyond the beginner stage. Your cheeses look wonderful. Always enjoy seeing what others are making in different parts of the world. Usually not so different than what I make in Northwest Montana. Seems cheese is a universal language. Side note, my daughter spent her junior year at Deakin University in Geelong. We spent a month traveling in your country at the end of the school year and loved it. Bundaberg Black Rum & Victoria Bitter were favorites.
I love that, Tom – “universal language” and I agree. Cheese truly is that.
BTW you’re sounding like a true Aussie with tastes for Bundy Rum and Vic Bitter 🙂
Cheers!!