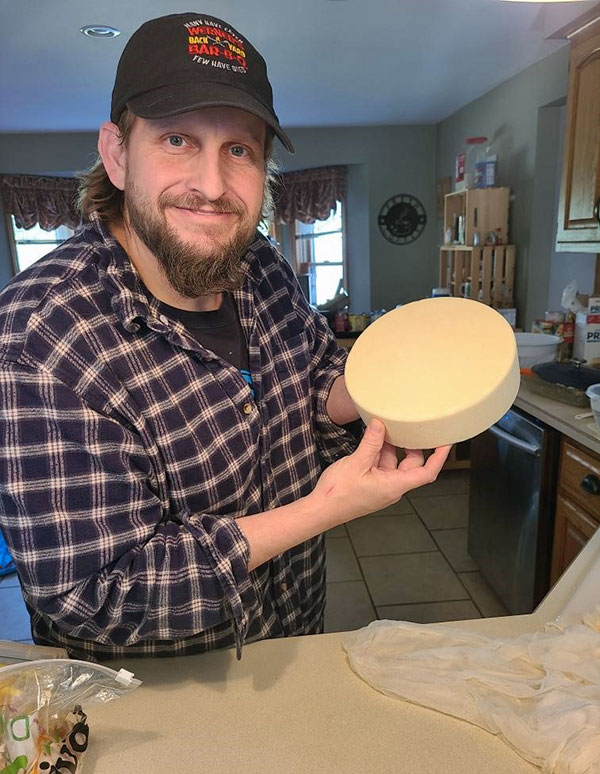
Ed with his first cheese – Swiss
I started making cheese 3 months ago here in Racine after watching a video on how to make mozzarella! I said “I can do that” and proceeded to fail as I watched all the curds and whey flow through the cheesecloth … darned ultra-pasteurized! That led me down the road to “how can I?” and then “how can I better?”
Now I do a cheese a week, and just bought what I need to do my first Brie. So very excited. Being from Wisconsin, it’s pretty much required to love cheese.
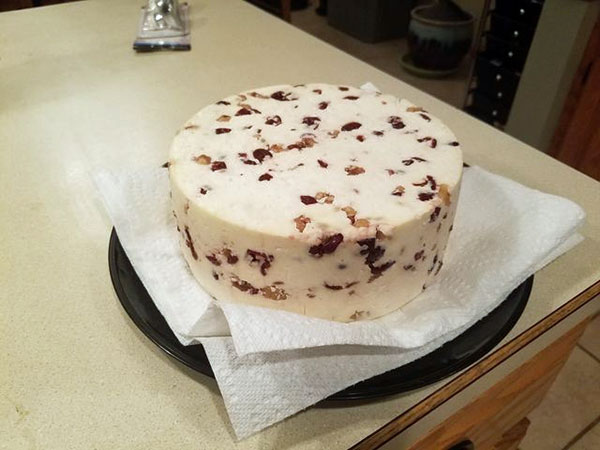
Wenslydale with cranberries and walnuts
Waiting for Christmas Eve
After three months and 7 cheeses, I’m starting to hone my personal cheesemaking superpowers – starting with successful mozzarella, swiss and parmesan that I’m very proud of and some Jack and Yorkshire that’s as beautiful as can be!
I’m also drying a Monterey Jack and have made ricotta mixed with homemade jalapeno jelly a few times with the whey!
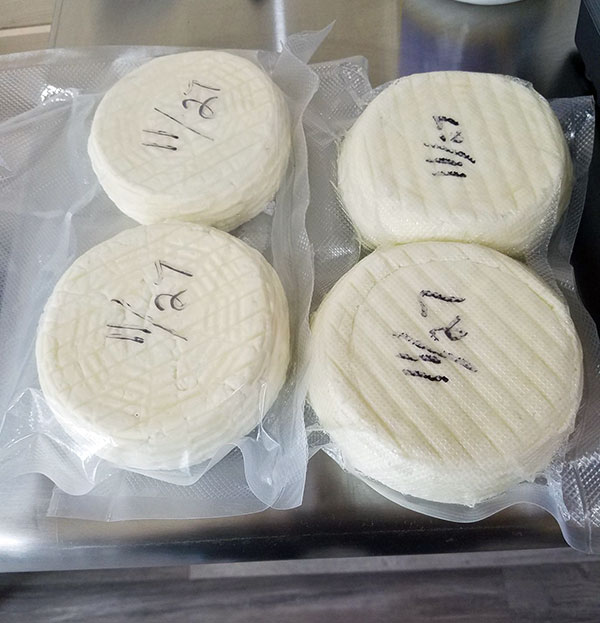
Caciottas made with NE Cheesemaking recipe
Cave

Cheese cave including waxed Jack, Swiss bagged, Caciottas bagged, Parmesan oiled, Wensleydale bagged. Not bad for only a few months (IMO).
Press
I’ve also developed a press that I think anyone can make/use without fear of weights falling on kitchen tiles, or cheese being half tilted! It also delivers solid pressure without breaking the bank for us starting artisans!
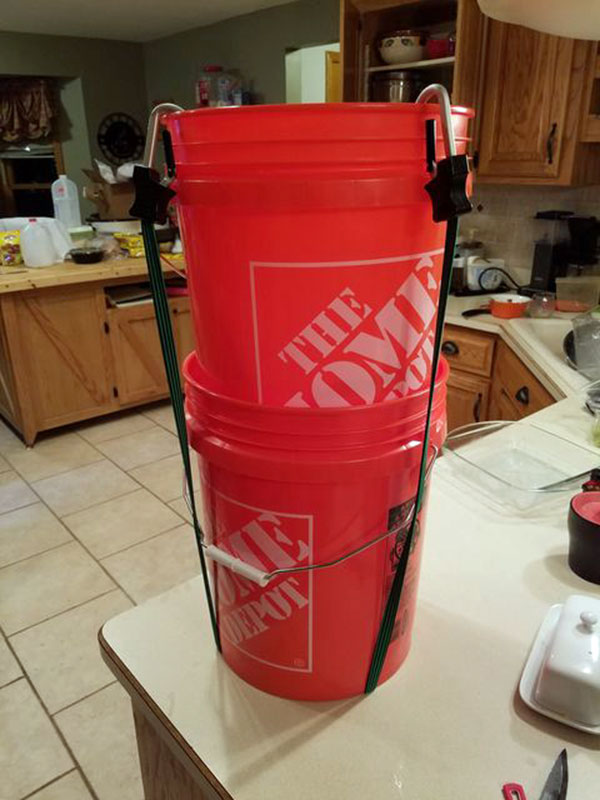
Two buckets and bungee cords! It works great!
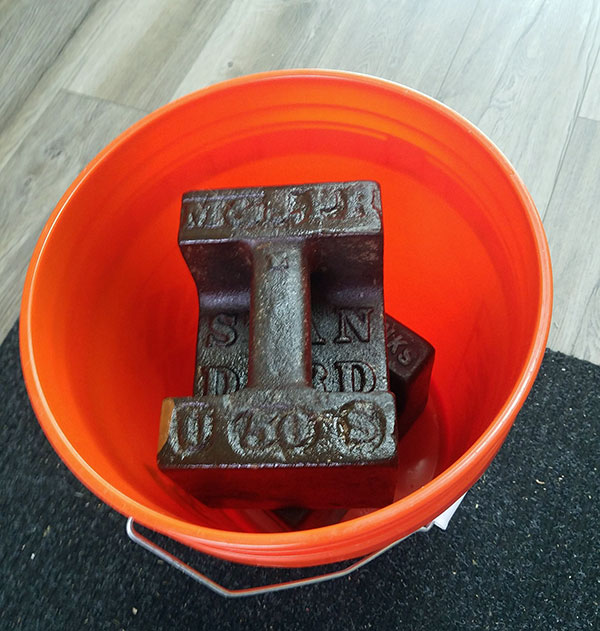
The colby I pressed at 100lbs turned out amazing. I used the large hard cheese mold, so I upped the pressure based on the surface area.
I used tractor weights (used to weigh tractors down so they don’t get stuck.) 50 lbs each, so pretty heavy. It worked perfectly.
The best part about the buckets … no crooked cheese! The lower bucket keeps the upper bucket straight, so it doesn’t press the cheese crooked! I’m adding a small piece of foam around the lip of the lower bucket to take up some of the space, but other than that it works perfectly!
The foam will fill the space between the upper and lower buckets to keep the buckets perfectly centered. Last night I simply put a folded over piece of cheesecloth in 4 places to keep it perfectly centered. Buckets are tapered. When you are not perfectly seated, there is a bit of space between the buckets … the foam will fill that. It will also keep any dust, etc. from being able to get inside the buckets while pressing overnight.
Bane Marie
One of my big tips that has been successful for me is my heating bane! I’ve tried pots on the stove, and been successful, but I really like the videos of professional cheesemakers using the big rectangular banes to make cheese, aiding in cutting and keeping a consistent surface. So, after some thought of how I can duplicate it, I turned to my trusty 18 qt. Nesco!
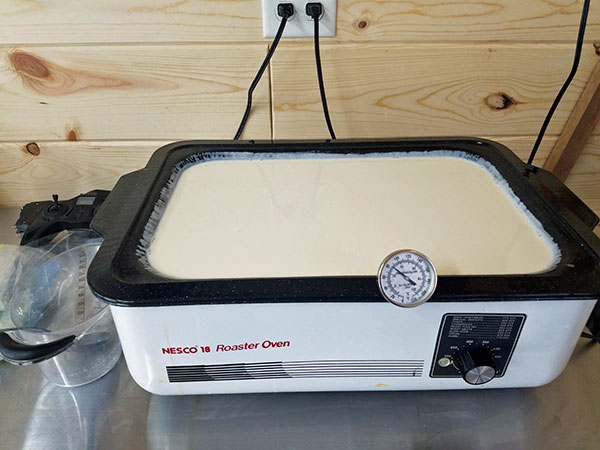
Nesco set up. Making my first Colby with NE Cheesemaking recipe
It holds a solid 4 gallons of milk, it has flat sides making it very easy for cutting the curds, and it’s not extremely deep that my curd knife (ie. an offset cake frosting spreader thing) cuts through it perfectly. I’ve used it now on the last 4 cheeses (one cheese a week), and its worked perfectly.
Cheese Lab
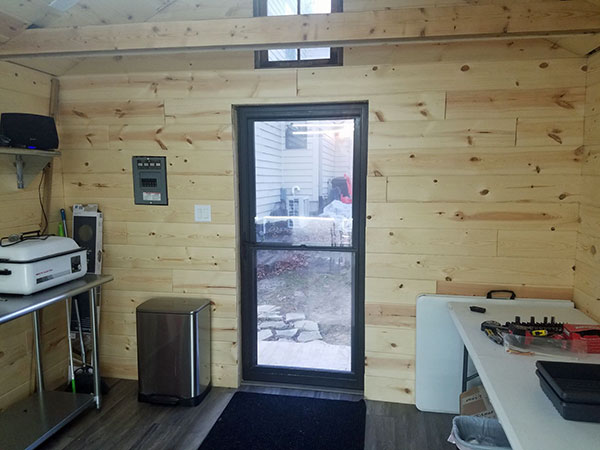
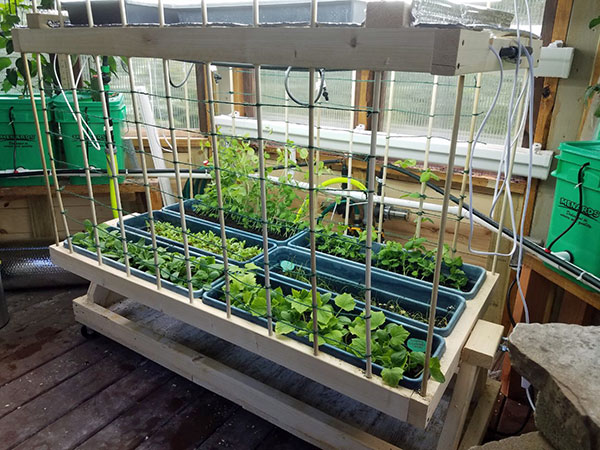
I had a 12’ x 12’ shed in my back yard that was unusable due to disrepair. I spent my vacation this fall gutting it, and setting up a cheese lab, microgreen and seed starting shed.
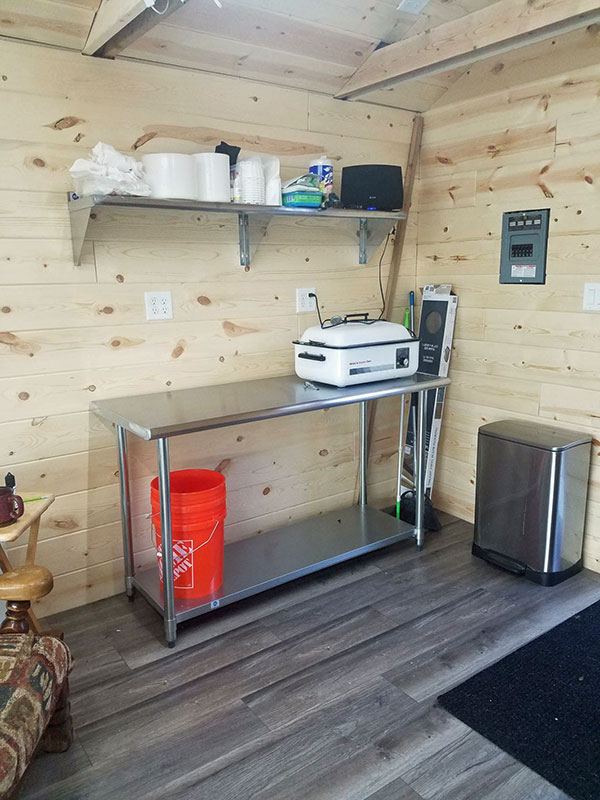
My cheese lab set-up. The addition of stainless steel helps me feel “commercial” and reminds me of when I used to work in the restaurant world … always a passion of mine to own a coffee shop! Maybe someday lol.
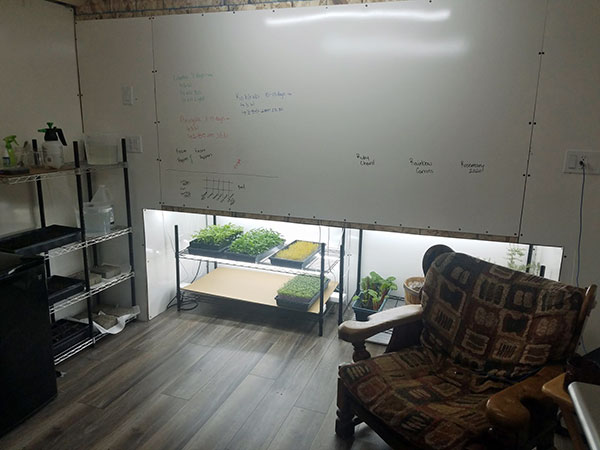
The walls (full back wall, and half of the two side walls) are whiteboard. It allows my daughters and I to easily mark what’s growing underneath the board, and what I have sitting in my cheese cave.
I ran electricity to it, completely insulated it, sealed it from any critters and made it rustic to match my style. I also, put in vinyl flooring to keep it safe from any spills, and it’s fully automated for lighting.
Goals
I love making cheese. It’s one of the most relaxing and satisfying things I’ve done in a long time!
It has sparked my creativity, and being a new product design engineer supervisor, creativity is crucial to my happiness. I love creating products with my hands … so this is right up my alley!
I’ve been able to develop patience, extreme multitasking, and the thing I love the most – connecting with other people across the world who share a passion for something they create with their own hands. Next steps are for some homemade charcuterie boards! Ideas are always welcome. 😊
Update from Ed in January, 2021, one month later: I have 4 Camemberts almost ready, finished Jim’s recipe for Monterey Jack (my first one from a different recipe was horrible, too much salt – it was inedible). This one tasted perfectly (well the curds did…I’ve got to wait a few weeks before cracking into the wheel, lol). Made a Butterkase that is so very soft, and a marbled Derby made with an herb packet someone picked up for me from their trip to Disney! It’s been a great holiday break. I’m picking up a professional food warmer to use as a new Bain Marie instead of my Nesco, with a perforated pan so I can do some cheddaring.


Very inspiring post Ed. Two follow up questions if I may:
1. Your two bucket press (genius) do you have some drain holes in the bottom or the sides?
2. When using your Nesco, do you cover the milk after you turn off the power during a holding time?
Thanks
Hi Ron, nice to meet you!
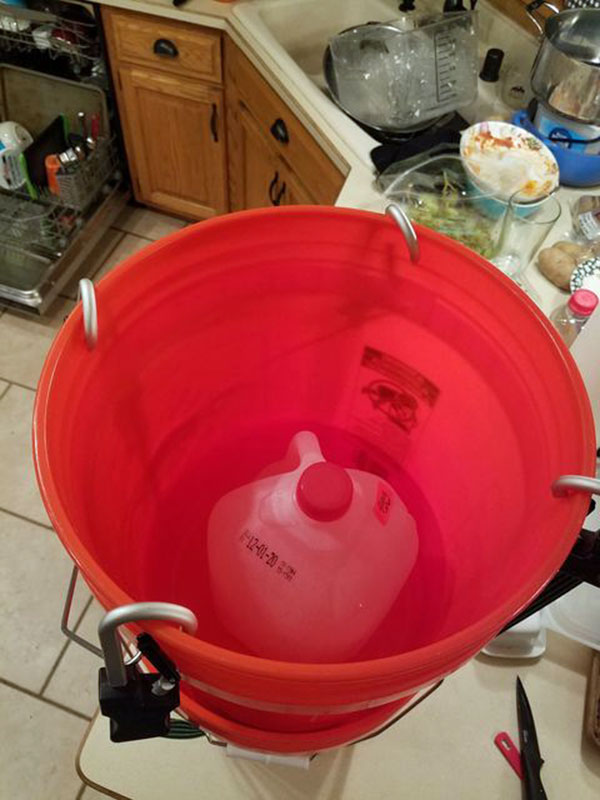
1. no holes, I use the mold inside the buckets. There is a spacer i put on the bottom of the mold so it doesn’t sit in the whey, The buckets are just the “press”, not the Mold. I use the medium and large molds from Cheesemaker.com. It actually works pretty flawlessly. I put that “pool noodle” cut piece of foam as a spacer on the lip of the lower bucket and it keeps the weight bucket perfectly centered. I’ve also learned since i don’t use the weigh for making ricotta every time, I actually drain the whey from the 4 gallons into the top bucket and use it a a weight, aprox 2.5 gallons @ 8lbs a gallon is around 20 lbs of liquid for the first press:)
2. I’ve done it both ways but honestly milk retains heat so well i don’t really need a lid other than to keep out dust/hair.
Hopefully these tips help you and others!
Ed
PS, My team just gave me a 150$ gift card to cheesemaking.com…I’m so excited to grow my collection of molds!!!!
Great story and info to go along with it!! I am “up the road” about 45 minutes from you and started making cheese in May of this year. Some great and some not so great but I learn more every time I go at it. Love your ingenuity of setting up your shop, especially your press. I am going to see if my partner can come up with a copycat of yours so thanks!!! Best wishes to you in your recent venture!
Thanks Suzanne! Where about are you from? Tip for the press..use flat bungee cords, and file a small (a little larger than the width of the flat bungee cord) recess on the bottom edge of the bucket (4 pls). Then the bungee cord will not slip off the bucket. Calculate the force of the bungee cords, that’s how i do my light weight pressing. I use gallon jugs for 8 and 16 lbs, then my cords put on a few extra lbs when i need a more exact pressure like from 16 to 20. I haven’t done a “bad” one yet, but am sure i’ll run into one someday lol. I’ve seen the horror stories LMAO! I’ll probably get a separate cheese cave for moldy type cheeses.
Hey Ed, I’m from Mequon just off I-43. So we are really close! Thanks for the tips of for making the press. Do you know of any others like us around the area that the cheese making bug has bit? It would be great to share tips, successes and maybe an occasional oops as well. I love to start my own plants indoors as well and love your renovated shed to house your fun stuff!
Ed/Suzzanne:
Too bad I moved from Kenosha a couple years ago as we could have met sometime. I was able to procure raw milk (4.6% butterfat) from a local dairy. My favorite cheese to make was a warm spiced bourbon rubbed Appenzellar. I make this in February to be ready for the Winter holidays.
Ed – I like your setup for pressing. I made what I call is an Uncle Fester (you need to watch the Addams family to understand), but it works using the same principle an allows me to press 10 to 12 inch wheels of cheese as I make Parmesan, Cheddar and Gouda that I age more than a year.
I moved from a modified refrigerator to having space for cheese in my wine cellar as the temperature and humidity requirements are similar as I can get the humidity to >80 in the cheese area while keeping the humidity in the wine area around 60%. I soon will be hanging proscuitto and breasola in the cellar.
Great story! Have us lots of good ideas.
Wow, Ed, you are an inspiration! I can’t believe that you’ve made all of those professional cheeses in just a few months and your “shed” redo is amazing! I love that it’s so well designed for your needs, high tech, and homey/cozy with the wood floors and furniture, all at the same time. I could see spending a LOT of pleasant time in that work room, and how great that your daughter is also involved. I too would love to see your Wensleydale recipe with the cranberries and walnuts! Your DIY press is so innovative and effective, but you are so advanced already that I’m sure you’ll be buying a huge state-of-the-art press soon — you deserve it!
Thank you Susan! I appreciate the comments! Not sure i’ll ever upgrade to a state of the art press, but i’m always looking for a better way to skin a cat…so never know. I’m already outgrowing my existing cheese cave. I’m thinking an upgrade there is on the horizon!
Loved reading this, thanks for so much inspiration to this new cheese maker!
Rachel, how long have you been bitten by the bug?
Great inspiration and only three months!! I’ve been wanting to do this for three years but feel so doubted by the task. Guess I need to “just do it!” Live your story!!
The look in your eyes as you hold up your cheese says it all. Contagious, isn’t it, this cheesemaking thing. Personally I think the inventive solutions we come up with are more than half the fun. After all, modern Cheesemakers are descended from those who had creatively figured out how to transport milk in sheep-stomach bags. Loved the bucket and roaster oven ideas.
Your next hurdle is ageing the little brutes so I thought I’d share my own invention. I call it the “automatic morale rectifier”, or AMR, and this is how it works. Whenever you get depressed because two months into the life of a formerly smooth Colby it has turned into what looks like Swamp Creature droppings, take a moment to pour a small glass of 80proof AMR and down it. With your morale thus rectified, taste the monstrosity to see if it has any potential at all. If it does then re-name it something catchy, like “Swamp Stilton”. I’ve been doing this for a few years now and am convinced that every single named cheese began as the creatively renamed failure of another brave Cheesemaker.
I love this….not looking to my first run-in with a swamp creature droppings but will completely take your recommendation! So far the fear of consumption has been very minor, but i would imagine the more advanced i become, the more risk there is lol. Thanks for the laugh Lon!
This is fabulous! I just bought my first beginner cheese kit and can’t wait to try. Love this setup!
I just Love this. That would have been my hubby’s way of making a press. Great work & inspiration for others!!
Gail
How low of temp can your nesco roasted consistently hold?. Will let stay in the 86 to 90degs range? Thanjs
It holds temp perfectly! I haven’t seen temp fluctuate more than a degree or two over a couple hours.
Terry, I should also mention that I only heat “up to” the temp I need…Once it’s there, I turn it off. It holds the milk to temp perfectly, and once i need the second heating, I turn it back on. Typically i set it to 350 degrees, it climbs up to temperature slowly and steady, no burning, and once it hits the 86 degree temp, i unplug it and begin the culture/etc. Once i stir the curds, and the temp needs to go up, then I turn it back on to 350 degrees. Hope that helps.
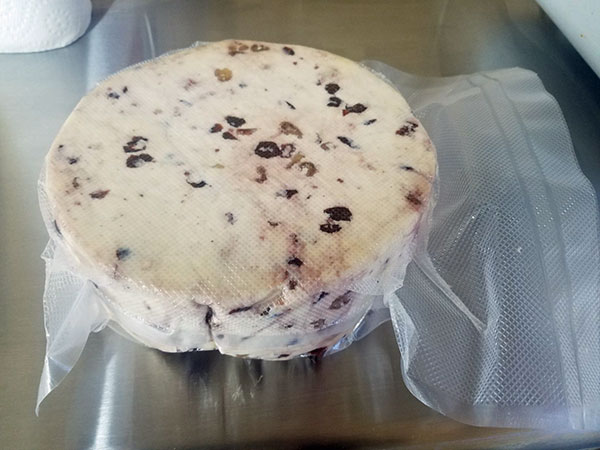
Really amazing setup and some fine looking cheeses. Congratulations. I’m curious about your method of bagging cheese wheels. How are you doing that?
Vacuum sealer. I typically follow the directions about drying the rind…then vacuum bag it, and store it in the cheese cave. Thanks for the question! The Wensleydale barely fit in a bag…but i was able to squeeze it in. Bags on Amazon = inexpensive. I also always double seal both ends (learned this through Sous Vide cooking)
Hey Ed! Just love your creativity and passion for making things with your hands! I love doing the same thing!!! I have cured my own prosciutto from a domestic pig, but now want to hunt a feral pig to do the same! My husband made me a prosciutto carving stand out of black walnut from a tree that had to be cut down. Want to try blue cheese and more types charcuterie.
Would you list the features of your Cheese lab? (loved the stainless!) (Kitchen and Clinical lab experience in my past)
1. Is it climate controlled?
2. Besides growing lights, what types of lighting did you use?
3. Do you have enough electrical plugs?
4. Would you put in a sink w/running H2O if you could?
5. What do you think about lining the walls with a mix of juniper or cedar with the pine planks to discourage critters, mold?
Hi Laura, I will put together answers for all this. You ask great questions, and I want to give them thorough answers. Watch for them later today!
Ok Laura Here goes:)
1. Yes, when i designed and built (restored a dilapidated shed) not only completely insulated the entire room, but i also used materials and methods to “seal” as tightly the room as I could. I used a secondary layer of plywood/hardboard to retain heat and also staggered the joints to keep air leaks out. I have a very small space heater the occasionally runs keeping the room at a moderate 70 degrees. This works because per my comfortable chair…i also use this as my office during this covid crisis.
2. I only use T5 LED shop lights in the entire room. https://www.amazon.com/SHINESTAR-12-Pack-Integrated-Workshop-Basement/dp/B08723TS9X/ref=sr_1_1_sspa?dchild=1&keywords=T5+shop+lights&qid=1607964076&sr=8-1-spons&psc=1&spLa=ZW5jcnlwdGVkUXVhbGlmaWVyPUE4SlpDNFVSOUg2WVcmZW5jcnlwdGVkSWQ9QTA0ODkyOTIxSU5RVVNKNjI0TTNEJmVuY3J5cHRlZEFkSWQ9QTA5NTc4ODlPNjRJMUowMk5MOU4md2lkZ2V0TmFtZT1zcF9hdGYmYWN0aW9uPWNsaWNrUmVkaXJlY3QmZG9Ob3RMb2dDbGljaz10cnVl They are inexpensive, and provide 6500K which means plenty of light for the Microgreens and other green things to thrive.
Yes, by design. I put them all high because i knew i was going to put in stainless counters. There are (on a 12 foot wall) 3 double outlets (total of 12 possible outlets) and the left side is on a separate circuit than the right side. The lights in the grow area are on a separate timer controlled outlet, that runs for 17 hours, then off for 7. The overhead lights are in seperate outlets, so i can turn the outlets on and off. It allows me to have “mood” lighting that i have shining on the ceiling (multicolored strip lighting) It’s awesome at night lol and reflects beautifully on the pine.
4. Absolutely, that’s the next step. I plan on a dry sink that can be hooked up to the garden hose during the spring/summer months with a drain that is set up on a valve, so no critters can come in through it when it’s not being used. Stainless sinks are drastically more expensive than just a stainless table, so that’s coming soon.
5. I am not familiar with Juniper, not a common building material in Wisconsin i guess lol. Cedar is good as well, but honestly, didn’t feel it necessary with the sealing that was done. We have a cabin up north that is made of Cedar, and it get’s chewed up just as much as any other wood in my opinion. I say save the money for more cheese making!!!
My plan is to expand into meats this year as well once i get a steady supply of fine handcrafted cheeses, because we can 😉 lol Thank you so much for the questions!
Thanks everyone for your comments!!!
Thank you for sharing it’s amazing all that you have done . I just recently found this site and am excited to get started. You have truly given me inspiration ! One small step at a time ! Do you have a website or Facebook that we can follow your journey . You certainly have shared so much information here. Thanks again, Cindy
This has truly inspired me to get back to cheese making. So clever. Thanks for sharing.
Inspiring story. Loved the inventiveness and great problem solving skill you showed us. Cheeses look wonderful. Thanks for the great ideas.
Thanks Mary! Great to Meet you!
Thanks Mary! It’s great to Meet you!
Avery impressed with all you have done in such a short time! Everything looks amazing!
Thanks Elaine! Momentum is still going strong!
Love the cheese press idea with tubs and tractor weights and bungee cords! And cranberry walnut cheese…delightful!
I’ve been making two cheeses once a month because of raw milk availability. So since September I’ve made Gouda, cheddar, alpine tomme, Gruyere, Swiss, Havarti, And Jarlsberg. In January I plan a Tomme de Savoie and Toscano Pepato. I just made another Gouda making changes to get a more moist cheese.
I was using my basement as a cave, but it is not stable enough in temperature. I recently purchased a wine cooler, and this is working very well as a cave.
Well done! Creativity at its peak in cheese making!
Thank you Charles for the comments! Happy cheesemaking to you as well!
I like your ingenuity!! It makes me feel better about using what I have too. Your cheeses look great.
This is a “Guy Makes Cheese” story! I love your ingenuity and creativity of which making cheese was just the starting point. Your cheese press is awesome and when I show this to our handyman here at the monastery he’ll say, “Yep! That’s the way to do it!”
The easy chair near your cheese making area is as important as the rest! 🙂
Thanks for sharing your great story!
would love to know which of Jims cheese recipes you used and how much cranberry and walnuts you used to make your cheese.
Hi Cynthia! Nice to meet you. I used 4 gallons of milk, and used one cup each of dried cranberries and walnuts. We crack into it today! Very excited! I used cheese52’s recipe for this btw. She is on Youtube. Cute cat lol.
Thank you, Ed, for a wonderful report about what you are doing in Racine, WI. I’m super impressed with how you have made cheesemaking a personal journey of creativity. I love that you’ve figured out how to use what is at hand. Your cheese room with the sprouting greens is delightful.
Isn’t it wonderful to experience the transformative process of turning fresh milk into something aged and solid that will be enjoyed in so many different ways. There’s magic in cheesemaking.
Thank you, Jeri, for bringing this diverse cheesemaking community together so we can share our experiences with each other. I am intrigued with Ed’s ricotta and jalapeño jelly idea. I’m about to make tomato jam with lemon peel and it might be just the thing to layer between chevre or ricotta. Will let my creative juices flow on this idea….maybe mint leaves for the green…a red, white and green Christmas cheese!
Happy Holidays to all,
Meibao Nee
That cranberry walnut cheese looks amazing! How ingenious to think of using those buckets and tractor weights for your press. I have the worst time trying to press cheese without it being angled! What a great set up. I’m envious!
That is all super awesome!