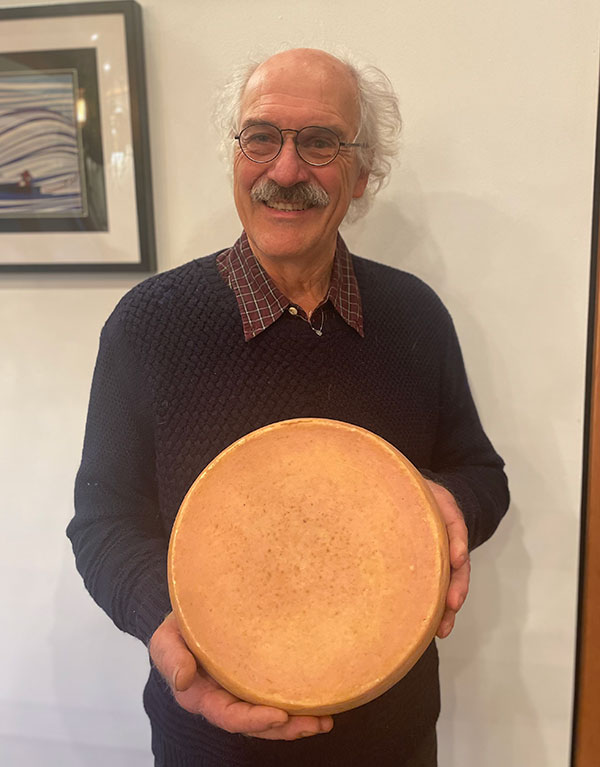
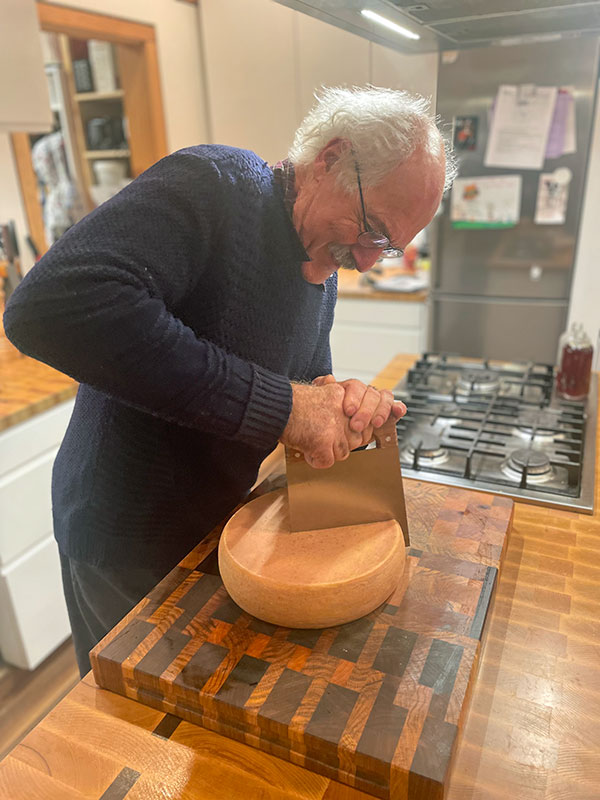
Andres Schneiter with his Raclette
If you’re on our mailing list at cheesemaking.com, you’re familiar with the Monday Morning Moos which links to our blog articles. Recently, Andres Schneiter noticed an article about cheese caves and “fridge conversions” and he decided to share with us some of his knowledge on the subject (see below).
Andres is a master home cheesemaker.
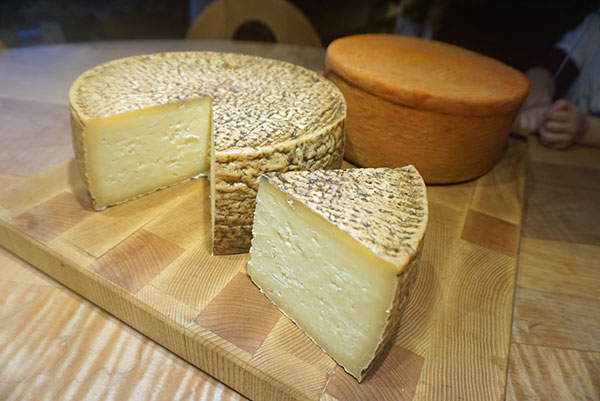
Goat Manchego and a Spanish smoked paprika/olive oiled washed cheese

Young Gruyere and Oka
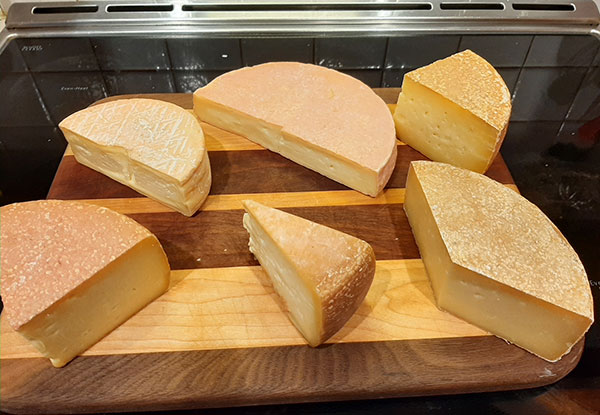
Bernese Alpine, Vacherin d’Abondance, Goat, Tilsit, old Gruyere, Appenzeller
5 months old Gorgonzola
14 month old thermophilic Emmental (my holes collapsed … but superb taste)
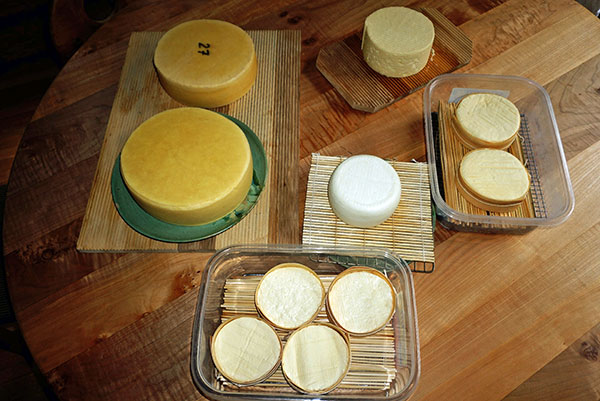
4 days of cheese making. Alpine, Gruyere, Vacherin, Mt d’Or (Swiss), Goat, Gorgonzola, more Vacherin (French)
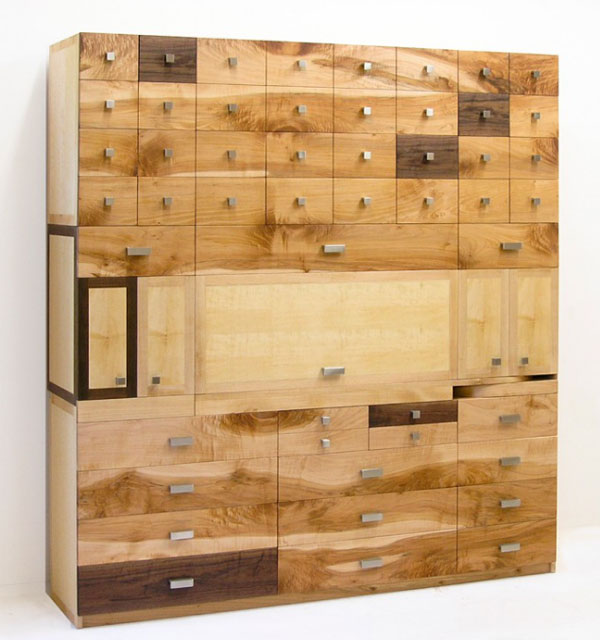
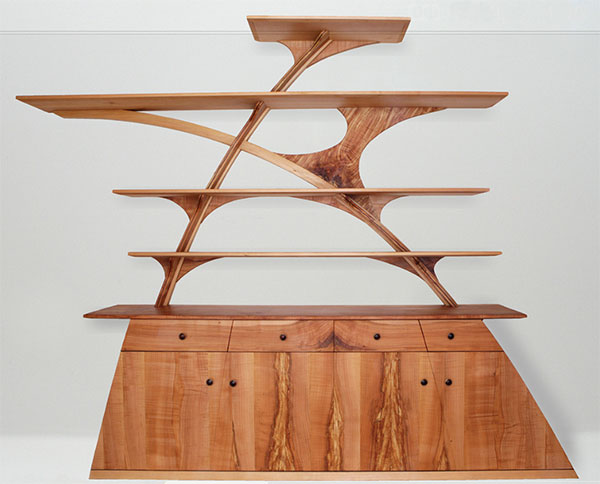
He is also a woodworker extraordinaire. (The pictures below are from his website – MapleArt: Custom Wood Furniture, Vancouver, BCHome – MapleArt: Custom Wood Furniture, Vancouver, BC)
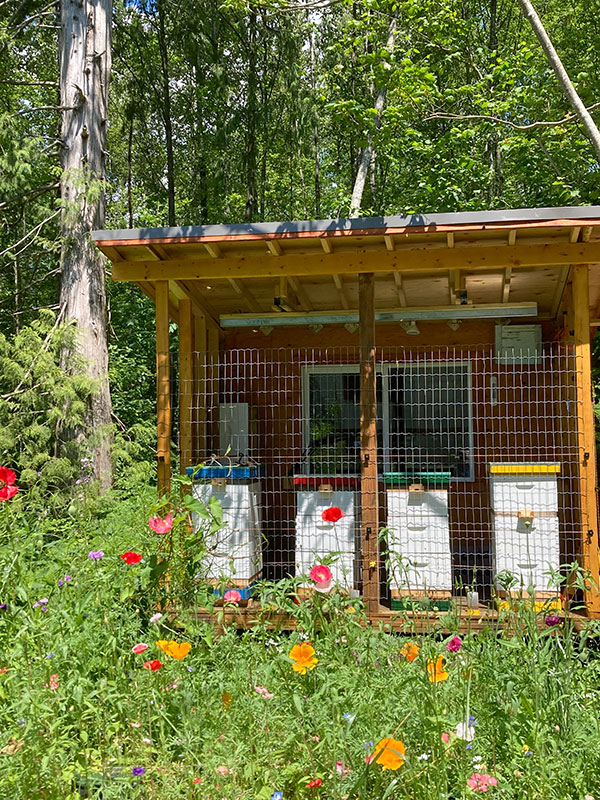
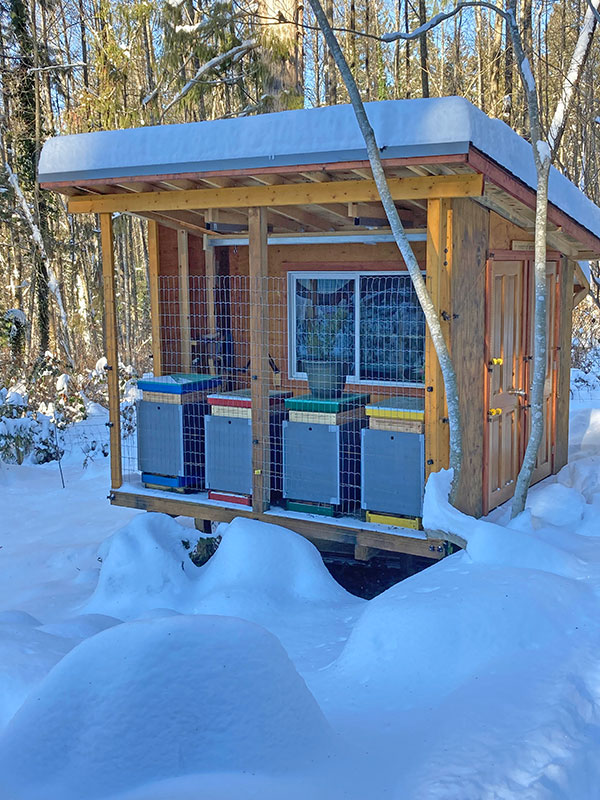
…and a beekeeper. (His bees have the nicest accommodations we have ever seen!)
And, he loves growing trees and rare plants such as the Chilean Bell flower (Lapageria Rosea) and Gloriosa Lily.

Lapageria Rosea, a tall evergreen plant. It is the national flower of Chili.

Gloriosa Lily, a poisonous tropical perennial
Andres’s Story
I was always interested in milk and cheese. Where I grew up in Chile, we had a small farm and a milking cow. With my Swiss parents, we moved to Switzerland when I was a teenager. Growing up in the sixties it was compulsory in Switzerland for every 16 year old city kid to work for 3 weeks on a farm. (This was a tradition left from WW2 but unfortunately it is no longer the case.) So, I milked cows, carried the milk on my back into the creameries in the valley and obviously enjoyed the cheeses.
I came to Canada in 1974, first to Kingston, Ontario to study for a Masters at Queen’s University. After graduation, my wife and I moved to Vancouver, BC.
In Vancouver, I once dabbled a bit into simple cheese making with my children but a growing family, a busy career in engineering and then furniture making did not leave much time to make cheese.
4 years ago my son gave me a small cheese making kit which triggered me going into cheese making big time. I took a course in a school based in Spiez, Switzerland to become an Alpine shepherd in the Bernese Alps. This was a great course. (https://www.inforama.ch/inforama/standorte/berner-oberland)
I learned all about how to look after cows and goats in the Alps and make cheese, an ancient tradition in Switzerland. The focus of the course was on making Raclette and Alpine hard cheeses.
I took the course over three months. Since it was at the onset of COVID, in the spring of 2020, it was offered over the internet (normally one has to attend in person) with lots of lectures, from milking, testing milk, cow whispering and herding cows, scientific observations and basics on milk and cheese, health and hygiene, legalities and then, obviously, the main part – making cheese and aging it in commercial set-ups and more basic and old fashioned ways in Alpine huts way up on the mountain meadows.

Alpabzug, Almabtrieb in Wassen, Switzerland
Later, I was able to enjoy a detailed tour of the miles-long, famous, sandstone Kaltbach caves in Switzerland where I was able to learn a bit more on aging cheese.
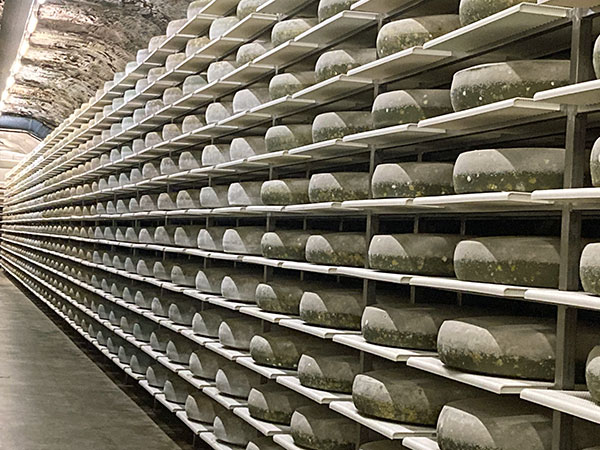
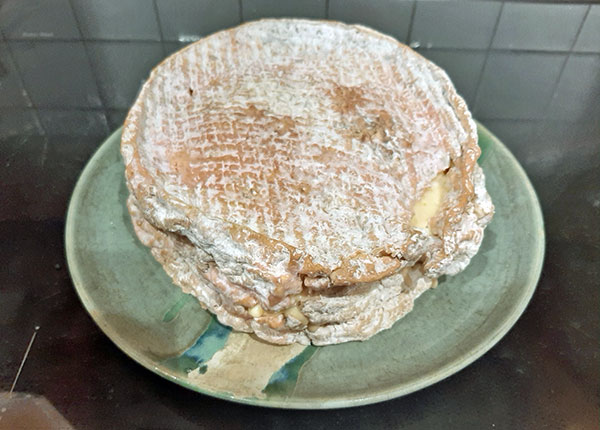
Moldy Emmental before washing
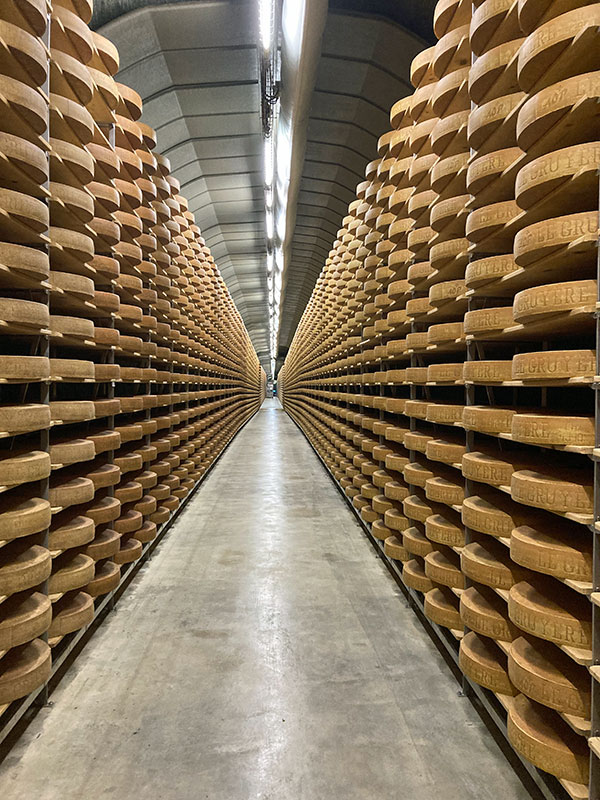
1km (.6 miles) of Gruyere
My hope is to one summer, perhaps, work in the Alps in the traditional way. But I fully realize that this is a tough job, perhaps meant for younger people than me. Yet imagine looking after all these animals in the fresh air and flowering meadows, enjoying the great vistas and, by the end of September, returning into the valley with cows and lots of cheese!
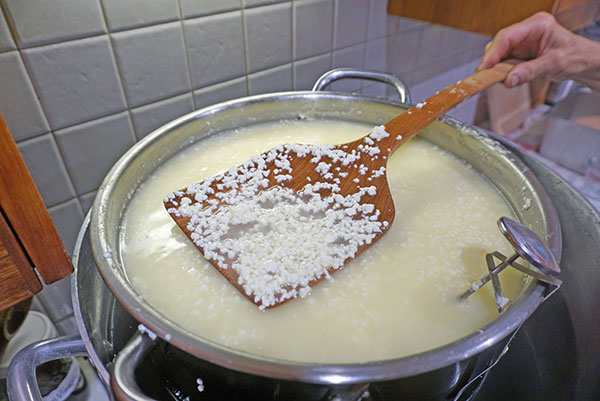
Being a wood worker obviously helped in building a good cheese cave and in making many necessary tools such as a press and even a special wooden “spoon” to more evenly and gently stir the curd, to allow monitoring it and to provide a platform for cutting individual larger pieces.
I also use a 12” copper plate at the bottom of my 30l (30 qt) pot. Copper is particularly important to make good Emmental and Gruyere cheeses. In Switzerland only copper vessels are used to make cheese.
Now, I process about 100l (26 gallons) of milk from a local farm every three weeks in the spring and summer months to make about 16 types of different cheeses – mostly Swiss, French and some Italian and Spanish cheeses.
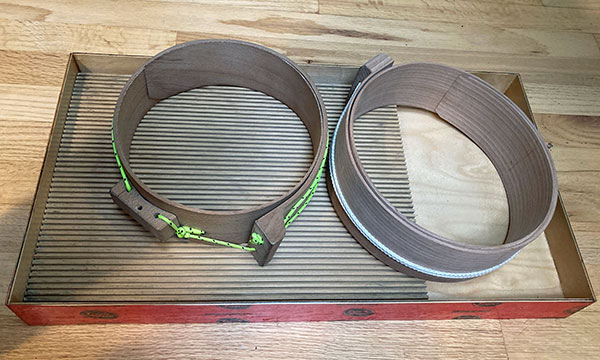
I mostly form and press my cheeses in adjustable wooden forms, called Jaerb.

My cheese press is simple and uses the principle of a lever arm. I designed it for a ratio of 10:1, meaning that for every kg (2.2 pounds) of weight at the end of the lever, I get 10kg (22 pounds) of pressure on the cheese. The holed bar in the centre allows me to adjust the pressure point for maximum efficiency depending on cheese height. The pressing weight can be adjusted from 10kg to 75kg (22 to 165 pounds).
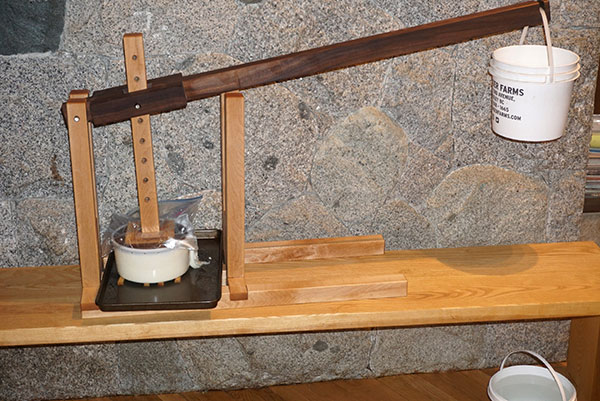
10:1 cheese press with height adjustment.
Remember that when pressing cheese, it’s not the total weight that matters but the weight per square inch, i.e., the bigger the cheese diameter, the bigger the weight. Using a bucket with water as weight allows
for fine adjustments. When pressing in whey is required, I replace the cookie sheet with a deep pan.
How to Make a Great Cheese Cave
By Andres Schneiter
90% of the effort in making a good cheese is spent in the first few hours by resting the perfect milk, infusing it with the cultures, cutting and cooking the curd, pressing and salting. However, the last 10% of the effort (but almost 100% of the cheese’s time) is spent in the cheese cave.
A good aging environment is critical to making a good cheese with a beautiful, natural rind. Unfortunately, this is also the most difficult part for a hobby cheesemaker, yet will determine success.
There are many ideas floating around on how to build a good cheese cave. I found none of them satisfactory or within my budget. Hence, I decided to design and build my own. I must admit that I had an advantage to start with: a root cellar which is relatively cool and has higher humidity than your average basement. But the principle can work anywhere.
To age good cheese, one needs a clean room with a temperature of 10 to 15C (50 to 59F) and 85 to 95% humidity. My approach was to build a large plywood box, 4′ x 5′ x 30″ deep.
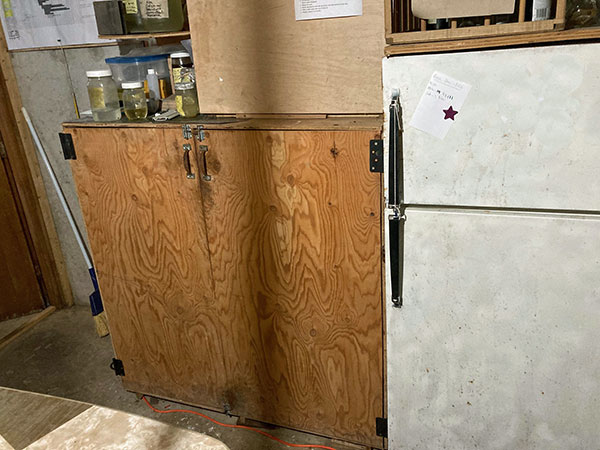
I lined it with 2” of high density styrofoam (better temperature control) and FRP panels for easy cleaning. The base is made from a large tub (4″ high) filled with plaster of Paris (see picture below) which is saturated with water (but without standing water). On walls and doors, I hang humid towels (change once a month).
The size is critical: the cave has to be as full as possible with maturing cheeses of different ages to create a good environment, so good molds can grow on rinds. A full cave will produce better cheese, so, sizing needs to correspond to the amount of cheese produced.
During 8 to 9 months of the year, the temperature of my cellar is between 10 and 14C (50 and 57F). However, lately, the summer months in the Vancouver, BC area have been very hot, dry and exceptionally long – raising the root cellar temperature to 18C (64F), too much for the cheese. To cool the cave, I drilled a 4” hole from the adjacent fridge into the cave and installed a fan. It perfectly cools the cave.
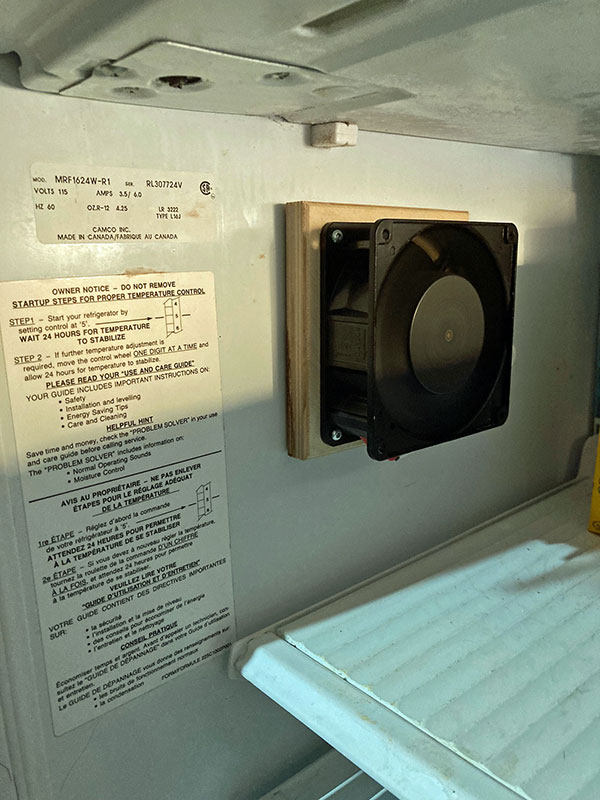
Fan in the fridge wall
An advantage, or disadvantage, depending on your point of view, is that the humidity in the fridge slightly increases; great for veggies, other things perhaps not, especially when you get a bit of condensation. (I must admit, my wife was not so happy with what I did to her fridge, but she likes the cheese…). When not needed, the hole is plugged to keep the humidity in the cave high and constant.

Temperature, humidity probes
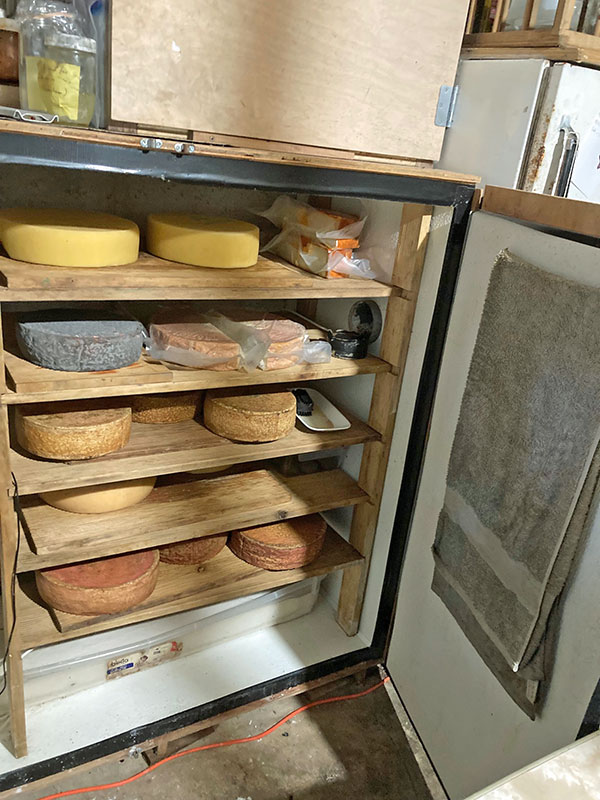
Shelving is very critical. In Switzerland, cheeses are aged on wooden shelves.
I would never use plastic or steel. My experiments showed that most woods get moldy in a high humidity, acidic environment within a few days.
Sitka spruce, however, stays clean for months. I clean it with only boiling water every three months and then let it dry in full sun.
I tried oak, maple, ash, fir, regular spruce, pine and beech but nothing worked like Sitka spruce. To get better rinds and better initial drying of the young cheeses, I milled 2.5mm (1/10″) grooves, equally spaced and 2mm (.8/10″) deep in the shelves and boards. As I check and, where necessary, wash my cheeses once a day, opening and closing the doors provides enough fresh air exchange.
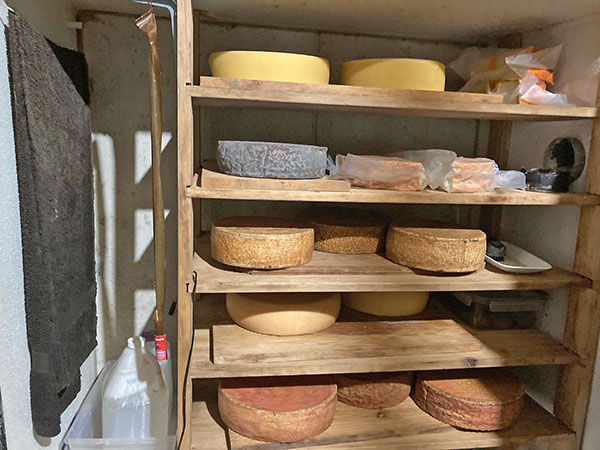
In my cave you can see Raclette, Gruyere, Beaufort, Bernese Alpine cheese, Appenzeller, Emmental, Goat Manchego, Oka, Belper Knolle and Limburger in various aging stages, some 24 months old. Each cheese is made from 30l (8 gallon) batches of milk, so weighs between 3 and 4kg (7 and 9 pounds) depending on the nature of the cheese.
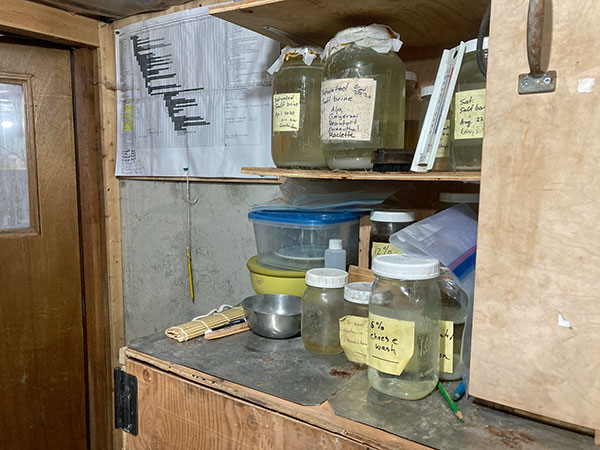
Above my cheese cave I have a warming chamber for ripening the Emmental cheese. You can also see a Gant Chart where I record details of every cheese. My brines are now 4 years old and are getting better every year!
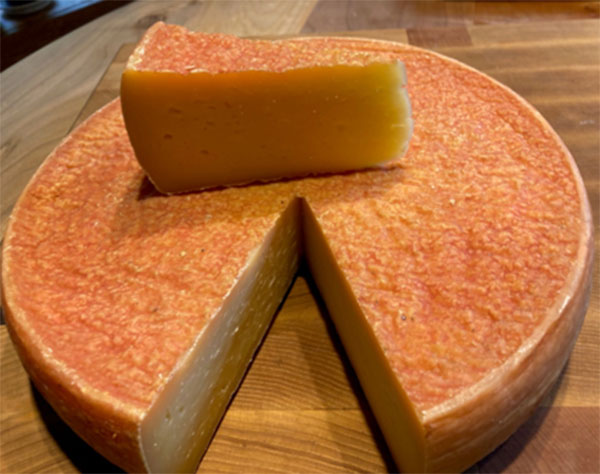
For me the rind is a signature of a good cheese. A perfect rind will harbour a great tasting cheese.
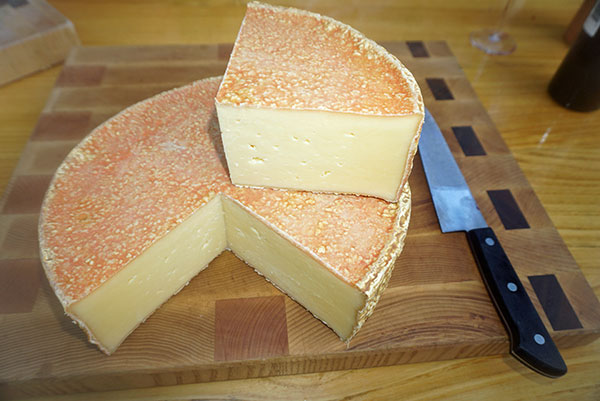
Beaufort
Now, if you are wondering what I am doing with all that cheese: I have a voracious appetite for it, a large family and many “cheesy” friends.
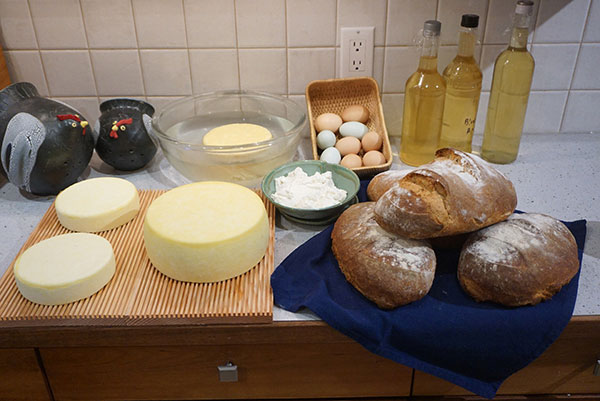
Life is good: my cheeses and bread, fresh eggs from our chickens and a liquor I make from blood oranges (tastes a bit like Grand Marnier).


How do you keep the molds and bacteria from crossing the different cheeses? I see no mention of Blue cheese.
Hi Michael,
Except for the odd Gorgonzola Dulce Verde I am not doing much on the blue cheese side.. My specialty is hard cheeses.
Now, molds and bacteria have no boundaries and they will go wherever they want. A good cheese cave fosters all of this in a happy balance and it’s not really a problem. Regular washing and observation is obviously important. I once had some issues with Geotrichum Candidum fungus jumping from Oka and Esrom cheeses on to my Gruyeres, giving me some unusual white spots. But I could brush it away before it buried itself. On the other hand it would not really damage a rind. When on an occasion I asked my teacher about this his answer was rather philosophical: “Andres, he said, cheese is like people, the older we get, the less beautiful we are but we develop a lot more character!”
What a great comment: “…cheese is like people, the older we get, the less beautiful we are but we develop a lot more character!”
Fasinating Andres! thanks for sharing. I see where the 4″ computer fan is used to cool the cave. Is the Inkbird used as a controlling thermostate or thermometer for status/recordkeeping? The plug next to Inkbird looks like it was from a computer power pack. The humidity side of Inkbird does that control anything? Like a water sprayer for example? Also I imagine the 4″ of plaster paris tray in bottom of cave is used as a ‘humidity sink’ is that correct?
Thanks again
Hi Denny,
You are correct in almost every point. However the thermostat and humidity measurement do not control anything, they are only for observation. Control is yet another level of sophistication which would be more trouble than it’s worth. For instance, the fridge fan, once off, requires that I seal the opening immediately otherwise the humidity from the cheese cave would escape into the fridge. I tried many methods but have not found a good flap or equivalent to really close the opening automatically, so I plug it by hand. Also I do not use humidifiers to maintain the humidity as they increase the temperature too much so I rely on my Plaster of Paris “sink” and humid/wet towels.
The nice part of the plaster of Paris is the fact that it does not get mouldy at all. If and when I upgrade my cheese cave I would make 2″ thick Plaster of Paris panels on all sides which would have embedded leaky water pipes in them to keep the walls moist.
Home Depot has this product, 4 in. Galvanized Back-Draft Damper with Rubber Seal, which might work to close off the air flow when the fan is off.
Also, couldn’t you plug the fan’s power supply into the Inkbird temperature controller to automate the cooling?
I learn a lot listening to such exchanges
Thanks Andres! I am now motivated to make a cheese cave! Sorry to bother you for One more question: How often are you opening the ‘cave’ to replenish the water on/in the towels? Relative to the several times you make cheese?Thanks again for sharing!
Good luck. You will be very happy with the results. Please also read the comments to Jim below; may give you a bit more insight.
I change the towels about once a month or so. They keep the moisture for that long. When I hang them, they are soaked but I press enough water out so that they no longer drip.
When the cellar is cool enough and I don’t need the fridge fan (in my case 9 to 10 months/year depending on the weather) they remain wet up to two months. As you can imagine, the fridge air has quite a drying effect.
As I mentioned in one of the comments, my cheese cave #2 would not use towels but plaster of Paris panels on the walls. This would be be done by making exact forms, 2″ thick, lay in some leaky 1/2″ PVC pipes (drill 1/8″ holes every 1″ or so) that you can connect to a water source (and your Inkbird controller). Also don’t forget some embedded bolts so that you can attach the panels to walls and ceiling through the solid insulation. You will end up with 4 3/4″ thick walls but laughing all the way to your cheese dinner!
Those rinds are gorgeous! I wish I had a root cellar, but alas, I live in Florida. So wine cooler “caves” are what I use. I can see the difference in the rinds with your cheese. Thanks for sharing your knowledge. I am a woodworker, too, but you are on a level way beyond me. Your pieces are works of art!
Hi Maureen,
You are too kind.
As I wrote in the main text, the principle of my design should work in any room given enough space. The cold air of the fridge will cool down the cheese cave. However, if the fan runs for a long time the humidity in the cheese cave could drop so it needs to be monitored extra carefully and the wet towels exchanged more often.
Beautiful story. Cheesemaking is a mix of precision and artistry, which is certainly displayed here. Wouldn’t it be lovely to have easy access to raw milks from well cared for animals? Today’s laws, rules and regulations are designed to promote sterility, the opposite of what is needed. We have lost the miracles of all those little bacteria. Don’t know about you, but I was raised on wonderful raw milk. Have to raise my own goats to find it now.
Totally agree. I was raised on raw milk and I attribute my strong bones to that goodness
Hi Marianne,
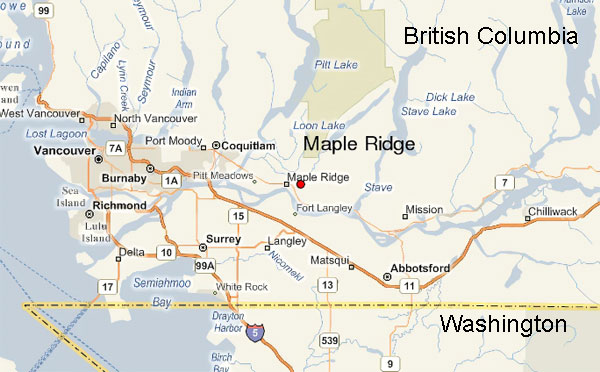
Fully agree. We were lucky enough to have neighbours with Jersey cows here in Maple Ridge. So our kids were raised with fresh, creamy milk that even allowed us to make butter; good, naturally yellow, tasty butter…
Please write a book and let me be first on the list to buy one!
Or at least make some YouTube videos! It would pass along your formidable knowledge and help the rest of us (aka ME) elevate our (MY) cheesemaking skills.
.
Hi Margaret,
Not sure that is my calling. But I will try to let you know when it happens, once I grow really old and furniture, bees and cheese get too heavy to lift, only a pen…
A novel approach to cooling your cave for sure. You get the best of both worlds, an extra refrigerator and a temperature-controlled cheese cave. Pretty brave punching a 4″ hole in your refrigerator.
Could you provide more details on that connection? Thanks.
Hi Jim,
I drilled a 4″ hole with a hole saw from the inside of fridge through the plastic lining, insulation and outside metal right through the cheese cave walls and insulation. I agree, it was a bit like jumping into a very cold lake… I then lined it all up with a 4″ steel pipe and mounted the fan on the fridge side. The wire to power the fan is fed from the cheese cave through the metal pipe. For the cheese cave side I made a 4″ wooden plug to seal the hole when the fan is not in use.
Another method that works well is to use gallon jugs of water which I freeze and then move into the cave until the water melts. It takes about 24 hours to melt and this alone can drop the temperature by about 4 degrees.
I have a conceptual issue with this approach. A refrigerator is air-tight. Doesn’t there need to be a return vent for air to return from the cave to the refrigerator for it to work effectively? As configured the fan would just lower the pressure in the refrigerator until it counteracts the pull of the fan.
In a perfect world you would be absolutely right. Fortunately my world is not so perfect and I am dealing with an old fridge in a relatively cool room. That is the reason the fridge is in that humid root cellar in the first place. I doubt that it is air tight so I could call my system an “open loop”. I know for a fact that once the fan is on, the temperature in the cheese cave will drop from 18C to 13C in about 3 hours. Now, it will then stay there which speaks to your point that the fridge may be “running out of air”. But that is good enough for my cave (and a compromise with my wife’s fridge…). I can turn off the fan for about two or three days and let the fridge “recover”. The well insulated cave will stay cool.
Ideally we could design a true closed loop with an air return to the fridge. But this would only work if somehow we manage to de-humidify the air return otherwise the fridge will not be happy for long and totally ice up (then I am in the dog house for sure). If that puzzle is solved in a cost effective way then we can automate the system by using Inkbirds as actual controllers.
Could you explain the purpose of the 12 “copper plate at the bottom of your pot?
Hi Joe,
The short answer would be because copper vats were always an essential tool when making cheese in the Swiss, French and Italian alps. So what could be wrong…?
The theory behind it has many aspects. As I wrote in my text, I use a plate because I cannot get a decent copper pot in Canada. So better a plate than nothing.
Copper has been proven to have antibacterial properties. This could be particularly important when using non-pasteurized milk. Gruyere, Emmental, Appenzeller and all Alpine and mountain cheeses are are exclusively made from non-pasteurized milk. Many Alpine cheeses are made from evening milk and morning milk where the evening milk rests in the copper vat all night, not refrigerated. Then the morning milk is added. Hence the antibacterial properties of the copper are very important.
There is also the issue of of the combination of the propion acids created when making Emmentaler cheese. In this case they help to a degree in creating the famous holes. So here too the copper oxides help.
It has further been shown that cheese made in copper vats has superior flavour when compared to cheese made in Steel vats, predominately after the cheese has been aged more than 12 to 14 months. It makes no difference in soft cheeses, cheeses that are vacuum packed and have no rind or cheeses that are waxed in the aging process.
Whenever I can, I make cheese from non pasteurized milk, especially my goat cheeses. The biggest issue I face is the cheeses made from non pasteurized milk can get bloated in the aging process when made in Steel pots. Copper largely prevents this.
I hope this helps
Andres
My copper plate is made from Cu-100, a food grade copper.
Thanks Andres
I loved reading about your cheese endeavors.I have done a little cheese making. I recently visited my daughter in Switzerland and we rode on the Bernina Express through the Alps. You must have had an amazing time learning cheesemaking there.
Yes, I agree it’s nice over there and I enjoy every trip, also visiting my daughter and family. Yet I would not want to miss Canada and the very beautiful BC West coast, it’s just different but monumental.
Are you open to visitors seeing your cheese making and woodworking? My grandson and I would love seeing what you do. I am in Idaho, 8 miles from the border and my grandson is currently working remodeling a boat north of Seattle.
You certainly can, just let me know in advance. On my MapleArt website you find more information on how to find me.
I was wondering about what he meant by he washes his cheeses.
Hi Paula,
Natural rind cheeses require a lot of care and the right environment. At the beginning you turn them every day and moisten/clean the surface with 5% salt brine. You can use a soft brush for that. As the cheeses start building a rind you do this less often but it’s important to keep turning and brushing/ “washing” the cheeses. I reuse my brines for a long time, sometimes adding other ingredients (morge) depending on the cheese. For the Raclette for instance I make the brine with white wine. Later in the cheese’s life when the rind is nice and hard you can also rub (wash) the molds of a moist rag which has fresh water only. If you get molds you may not like you can only rub off with a very light spray of apple cider vinegar
Ok, thank you for that explanation! Im super brand new to even entertaining the idea of cheese making…So I have a really long journey ahead of me 😊
Thank you for sharing your knowledge with the rest of us cheese-a-philes! Beautiful cheeses in addition to your other endeavors.
How lovely to read about another cheese maker from B.C.! I live on Vancouver Island so a very similar climate. Thank you so much for sharing how you made and manage your cheese cave. And congratulations! I agree that you are an artist!
Thank you. So you know all about our difficulties in getting unpasteurized cows milk in this country. I wish it would be easier. I also keep looking for sheep milk; just nothing around.
Hi Andres
I live in White Rock, BC and was wondering where you get your milk? Cost Cutters in Blaine WA sells raw milk in gallon jugs ($11.99/gallon). I am also a beginner cheese maker so am not “in the know” about where to purchase milk. I noticed Dania Farms is on the good milk list but it is expensive!
Hi Janet,
I like to know the cows and goats where I get the milk from. Also, they have to be on pasture. So that eliminates most milk producers and sometime it’s better to be quiet about my milk sources. I am sure you understand… We have strict rules in Canada…
Yes, good milk can get expensive and unfortunately is not immune to inflation. Even doing everything myself, not including labour, my sunk costs on the overhead and equipment, etc, i would have to sell the cheese for $30 a kilo. Not cheep. Yet for the quality and type of cheese I make I would have to pay $60 to $80 a kilo in the gourmet shops that carry this type of cheese. Pure insanity!
Wow, wonderful. Do you share your liquor recipe?
Once you have the right ingredients, it is relatively simple. I take non- sprayed blood oranges which have a clean, fresh skin that is still full of the citrus oils. You also need 96% (ethyl) alcohol which is not so simple to get in North America especially in Canada (easy in Europe). The next best thing would be “Everclear”. Then you need the best water you can get, definitely not tap water. I use my well water. The last ingredient is white, granulated sugar.
Peel the oranges (4 to 5) into long spirals, very thin and carefully not cutting into the white part below the oils. Add them to a glass gallon jug with the alcohol (1 liter). Then add 1 liter of water. Cover and let stand in a dark cool area for about two weeks. Then add 1Kg of sugar and stir until dissolved. Again, let stand for 2months in a dark area, occasionally stirring. After two months remove peels. Let stand for another 4 months. Now, if necessary filter and bottle. If you have the patience to let it age another 6 month so much the better, otherwise it would be ready.
If you prefer it less sweet, more along the lines of a brandy, add less sugar.
A bonus are the peels you remove after two months. Chop them finely and use them for a torte with a bit of the liquor. Heavenly…
Wow so much talent. Wood working, bees, cheese making are all arts and you are an artist
Thank you. Artist? I don’t think so. Just dreams, a goal and then the drive and endurance to follow through… and ask for help along the way. It is always there!