
We first met Steve when he sent us a couple of pictures of his modified equipment with this note:
What a great hobby! I just want to thank you for showing and supplying the best information and supplies. I’ve moved to a 40 quart pot – adapting home brewing equipment for cheese making. Kind of a double boiler arrangement. I also made a temperature controller to hold milk within +\- 1°C. (OK I’m a electrical biomedical engineer by day – a cheese maker by night.)
We posted his note in our February Moos-Letter (News From Our Customers section), then we asked him for more information. From his replies, we learned just how talented and resourceful Steve is!
How did you get started?
My wife (Karen) her step mother (Sue) gave me one of your cheese making kits, 30 Minute Mozzarella for Christmas. That was three years ago. After that, I wanted to learn more, and was hooked.
What kinds of cheese are you making?
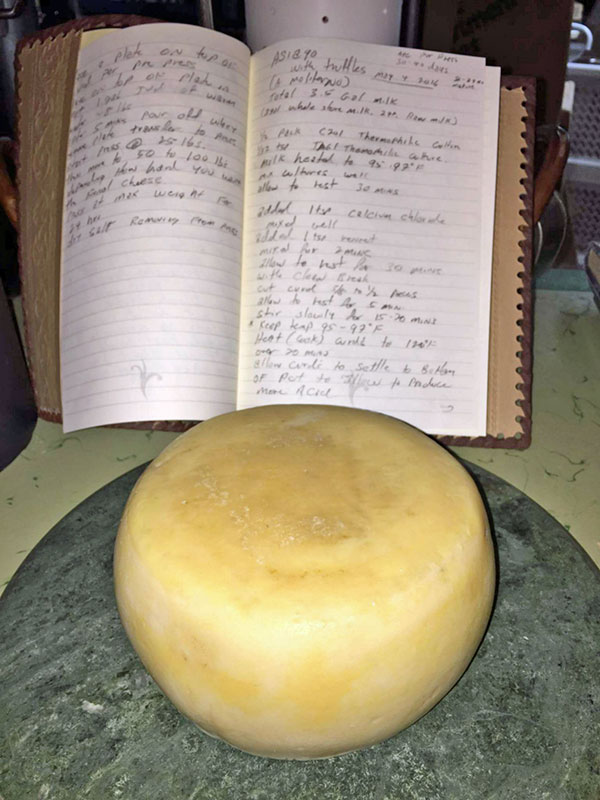
All types – some of my (and friends) favorites – Alpine tomme, asiago with black truffle, Bel paese (one of my wife’s favorites), Belper knolle, brie, cheddar, feta. Oh, I’ve had some flops, but it’s all learning. It’s a fantastic hobby – I may look into selling someday.
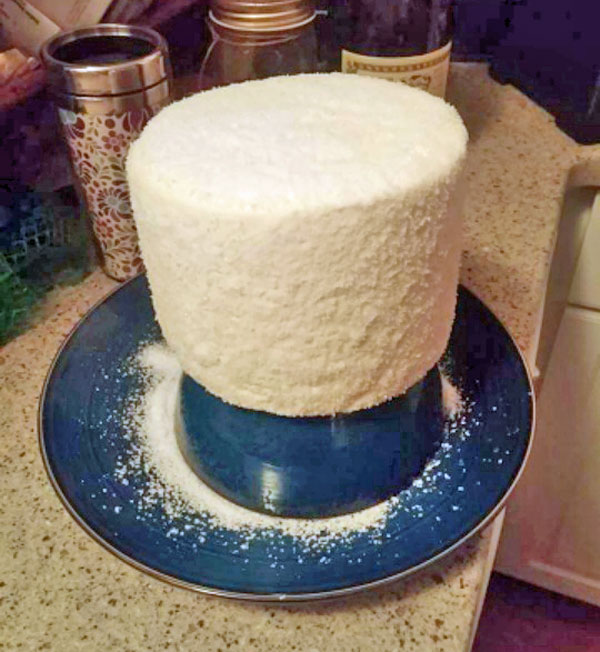
Cheddar
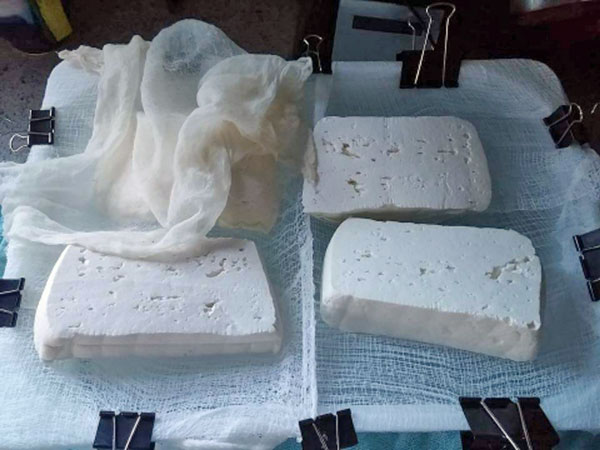
Feta
Colby
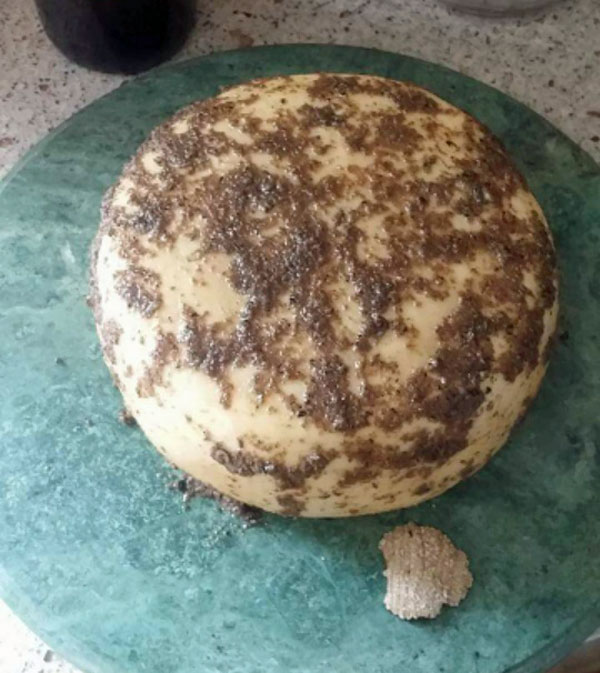
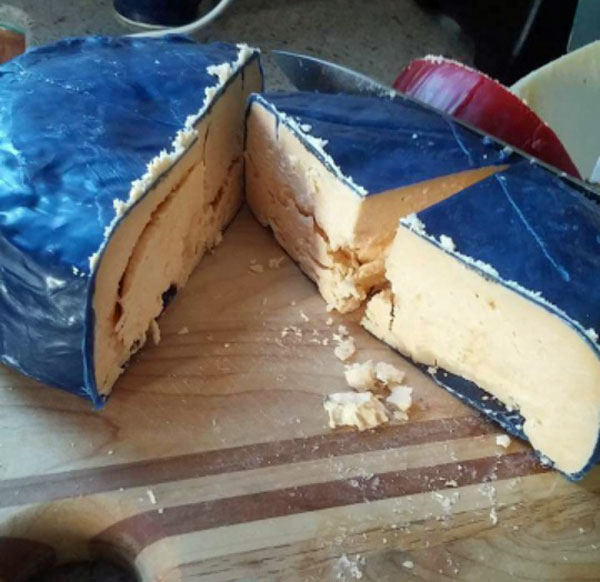
Asiago infused with black truffle. (Everyone’s favorite here)
Asiago before adding the truffle
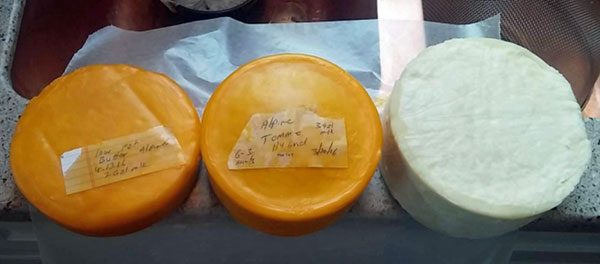
Left to right: low fat alpine, alpine tomme, Munster
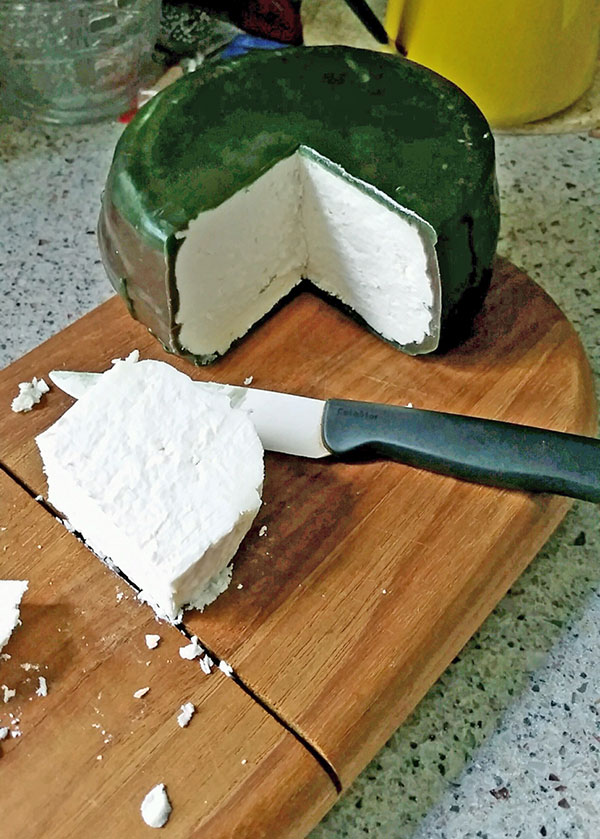
(Steve can’t remember what this was, but it sure looks good!)
What kind of “cave” are you using?
Only modified small refrigerators. I’m building a larger cave in the corner of the basement.
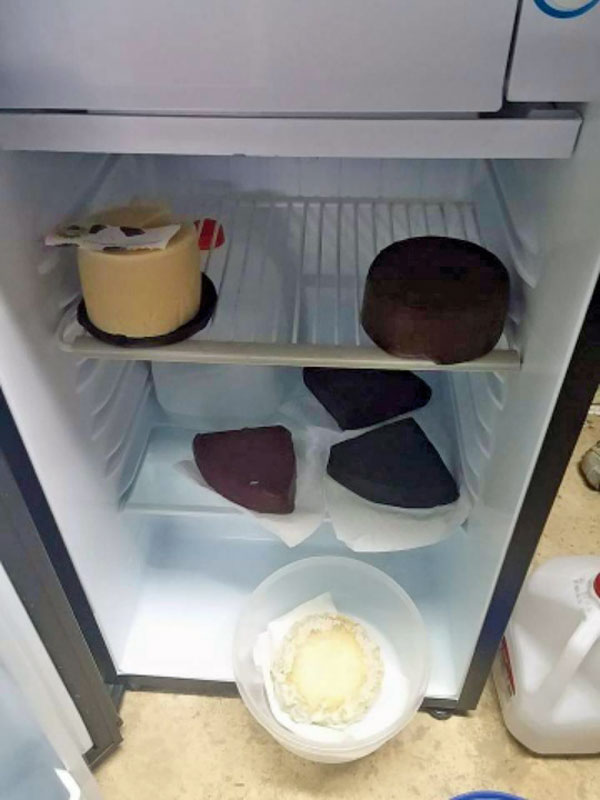
Parmesan on top, Brie on bottom
How did you adapt your equipment from beer making?
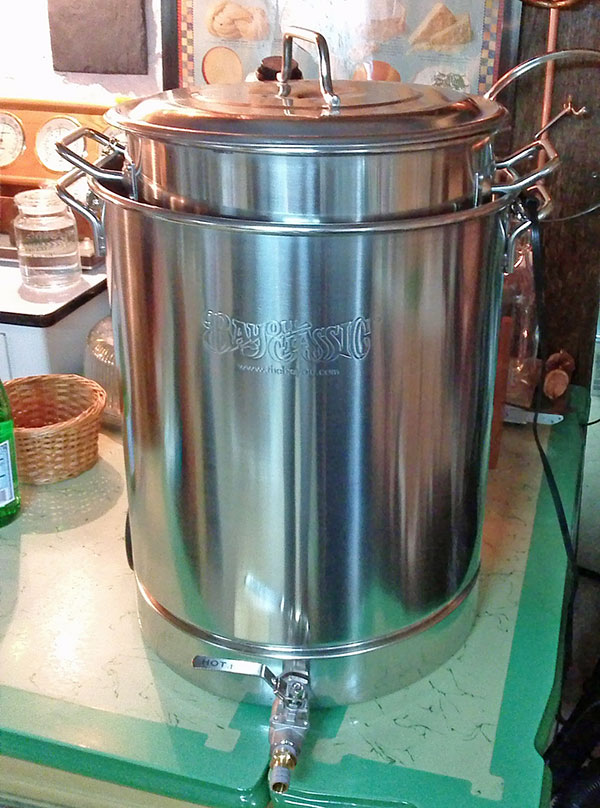
When I first graduated from making mozzarella to making other cheeses, I was using my largest kitchen soup/stock pot – about 12 quarts. It worked ok, but temperature control was always a problem. You see, we have a copper sink in our kitchen. It acts as a large heat sink, and the warm water bath cools quickly around the pot of milk.
That’s where I had the idea of a double boiler arrangement, a pot inside a bigger pot. But large stainless steel pots can get expensive. Checking secondhand and consignment shops, I found a 4 gallon pot. I had a slightly bigger aluminum pot to hold the water. This worked well, but was about as big as I could go on the kitchen stove.
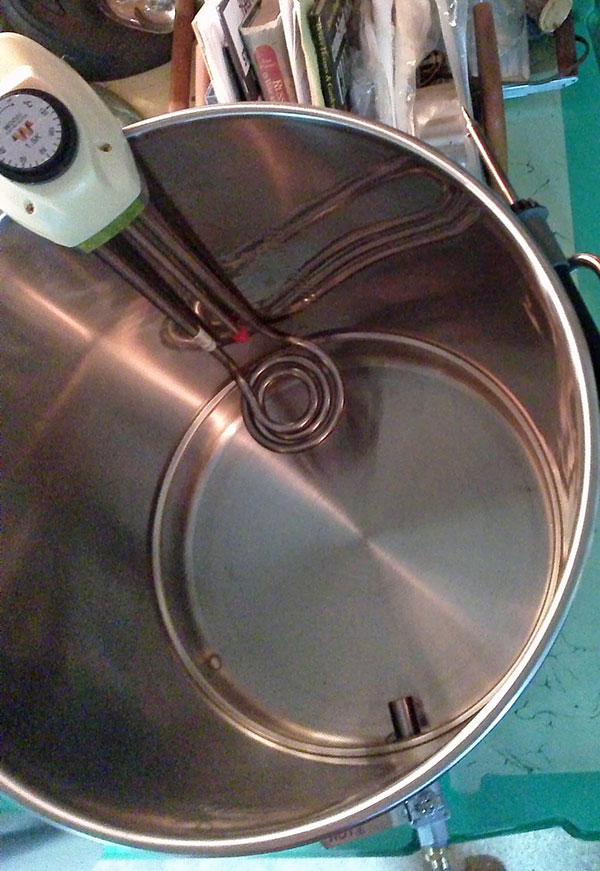
Then, I broke the thermometer that came with my first Mozzarella Kit. So, I was on the hunt for a good large-dial thermometer. That’s when I came across beer making equipment. The thermometer for beer making was ideal for cheese making. It was long, accurate, and easy to read. They also have pots – stainless steel pots, in every shape and size. Some with drain valves, built in thermometers, heating elements. I started thinking, all this stuff could easily be adapted to cheese making.
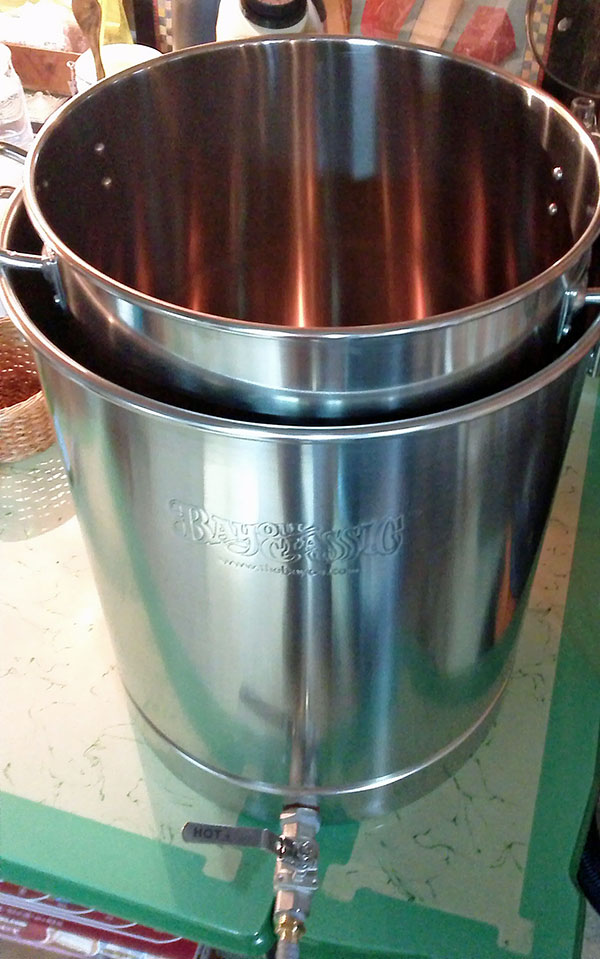
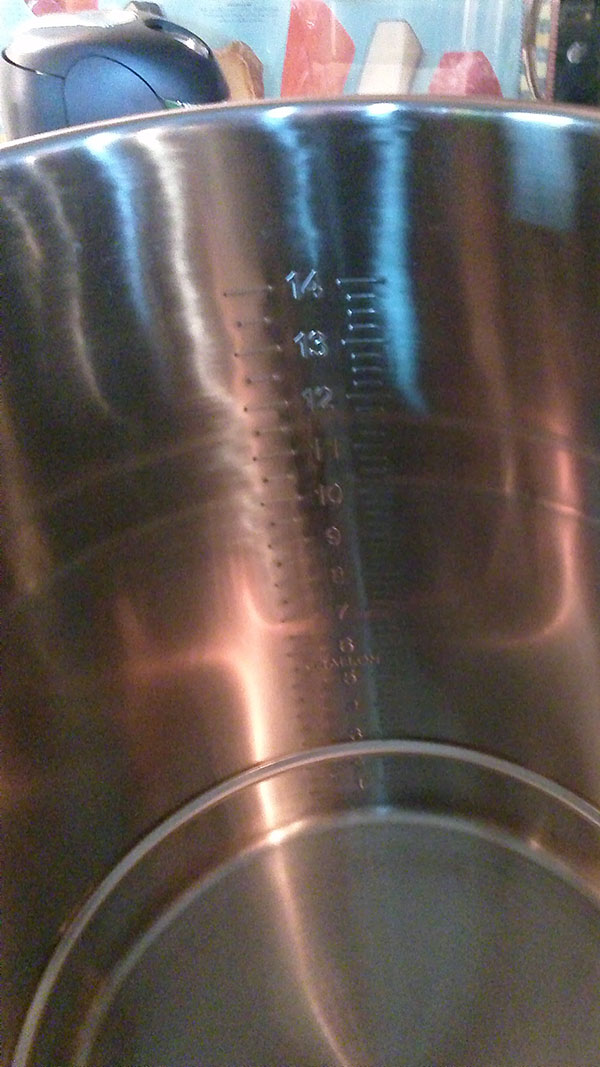
The people in the store were very helpful, but probably thought I was crazy, putting pots in bigger pots to find my right combination. That’s how I settled on a 40 quart inner milk pot and a 15 gallon outer pot for the warm water bath, complete with a drain valve. In beer lingo, these pots are known as wort boilers.
Of course, at this point, these pots were too big for stove top, so an electric heating element was needed. In beer brewing there are all types of heaters. I chose a European style which was temperature adjustable.
An ideal stand-alone setup. A pot in a pot with its own heating coil.
Also, in beer making they have hand pump syphons with stainless steel filters on one end – great for syphoning off whey. The whey is syphoned off in a smaller pot, of course the curd goes in to the molds, and the large water bath pot can be drained by the drain valve. Even though the pots are large, everything is easily managed. No heavy lifting.
So, thanks to my wife’s step mother for giving me Ricki’s cheese making kit. And, after breaking the thermometer that was in that kit, I discovered beer brewing equipment and it’s adaptability to cheese making.
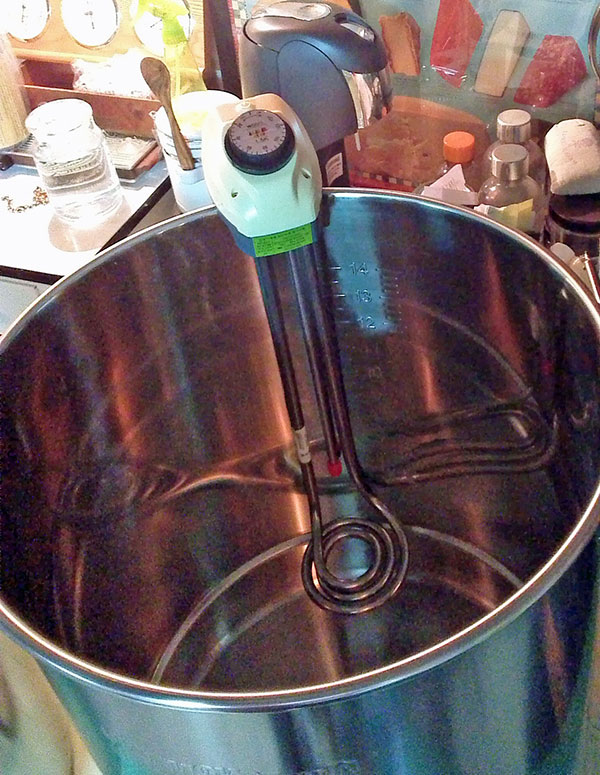
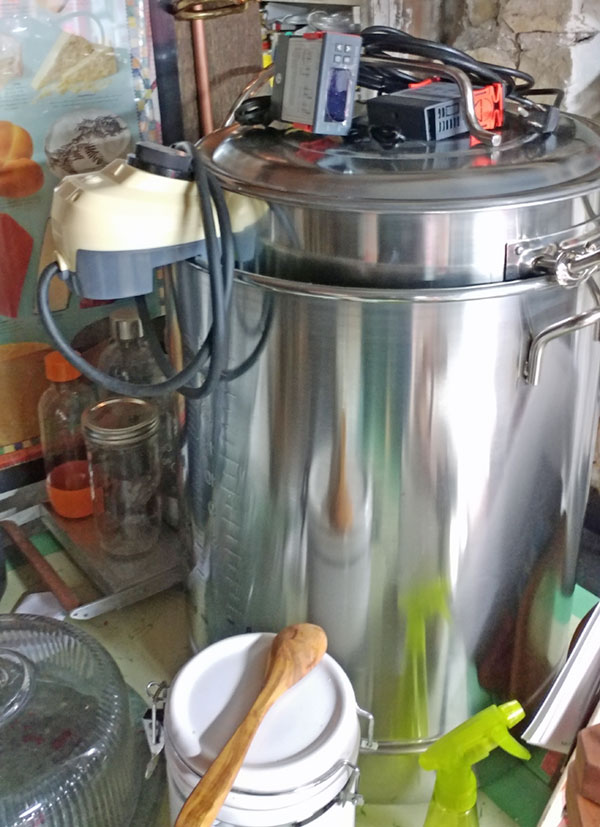
Of course, being an engineer, I couldn’t stop there. So, I built a temperature control system. Yes, they have them for beer brewing also.
Three digital thermometers, one for the milk, one for the bottom of the water bath pot and one for the top of the water bath pot. And, a very small fish tank water pump to keep the water in the outer pot moving (more even water temperature around the milk pot). It’s all automatic – the pump and heating element are switched off-and-on to hold the milk at a steady selected temperature.


Great article. Haven’t tried cheesemaking yet, but have kits on the shelf ready-to-go 🙂 The water, temp, circulation requirements for equipment made me think of my recent experiments with sous vide cooking.
My sous vide clip-on heater/circulator cost less than $60 delivered and keeps water temps accurate to within 1 deg F up to about 190 deg F. You can clip in onto any pot or container. This may be easier for us non-engineers to configure than multiple heating and circulation controls.
Can’t wait to try my first attempt at cheese making. I will buy raw milk at Birchwood Farm in Newtown, not far from Steve’s home base in Doylestown PA.
Not to divert your attention from cheese, but did you know that PA has near perfect climate conditions for cultivating truffles? But if you think waiting for your cheese to mature is difficult, you don’t want to know about the patience required by truffle farmers (7-15 yrs to establish a profitable crop with lots of vigilance) 🙂
Janet, Tell me about your sous vide clip-on. What brand? Source? Although I am an engineer, I looked at Steve’s arrangement & thought it too complex for a hobby where I might make a 2 gallon batch of something a month. I was especially put off by the 220 volt heater.
I’ll give that a try, Thanks for responding.
Love this article. I am a home brewer thinking of getting into cheese. Would love it if I could make use of supplies I already have! Thanks so much for this!
Steve,
Would you mind listing the brand/model of the European style heater shown in your narrative? Thanks.
I’ll get that info to you asap
Its a wooju 1.5kw. Heater 220 volt. You can find it on eBay.
Thanks for the great information and the great pictures. I am having trouble getting and keeping 85% humidity in my small cheese cave (refrigerator). I have tried small humidifiers,sponges, towels. bowls of water… Any suggestions?
Small computer fan blowing on a container of water with a Cotton towel acting as a wick.
Gets the humidity up around 80 to 90%
Please feel free to contact me with any questions
This set up looks amazing and I would really enjoy having it in my basement, but I have no man around and to do it myself, I would think that I would make a complete mess of it. Sure looks like fun though. So, when you get around to selling the cheese, I will be one of your first customers. Keep me in mind. Thank you.
I started hunting consignment| second hand shops for larger pots. I had a 4 Gal pot in a aluminum turkey frier pot that fit fine on the stove. A good beer brewing thermometer and your all set..
That setup looks like it should work great. You have made some awesome looking cheese.
How did you get that little press to work so good on your cheddar? I had one like it and couldn’t get enough pressure out of it.
My wife got that press for me. Its cherry wood. Constant checking And tightening the first 8 hours or so. I measured the pressure I can easily get 100 lbs once the curd is compressed .I building a larger model out of maple. 8 inch mold.
Hope this helps
I also got my real start into cheese making from a Christmas present although I sort of dipped my toe into the water shortly after my mother-in-law passed & we found her creole cream cheese molds.
I really like your equipment. I think I might try to copy it. I have 2 questions if you don’t mind. How do you prevent cross contamination in your “cave”? How do you infuse the truffle?
Cross cantamination .. Lots of cleaning . and I try to make same type mold cheeses at on time. I am building small cave in the basement that I can compartmentalize better.
The truffle, I coated the asiago with truffel infused olive oil to keep from drying out. After 4 months used a trier to plug holes and fill with ground truffel and plugged with cheese plug.
Let it age another 3 months.
Hope this helps