Bob Albers in Mandeville, Louisiana has been learning to make cheese since he retired from his career as an electronics engineer. (We interviewed him in August – click here.) He has shared his knowledge with us in 3 previous articles- Creole Cream Cheese, About Cooking Curds and Making a Drying Box. Now, he has tackled the awesome task of making his own curd cutter, and, it appears to be a winner! If you have any questions about it, you can ask him in the comments section at the end of the article and he will be happy to respond.
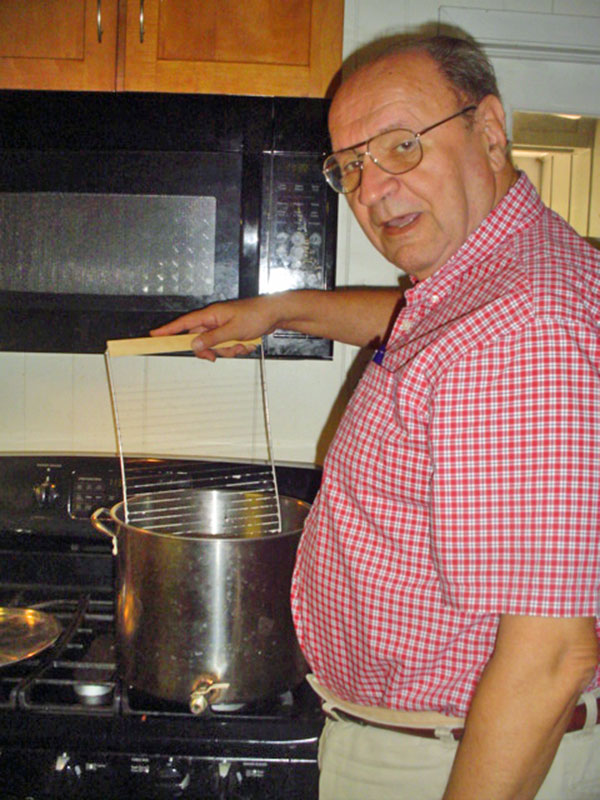
This photo was taken while Bob was making Farmhouse Cheddar (recipe in Home Cheese Making)
HORIZONTAL CURD CUTTER
By Bob Albers
Some time back, Jerry Pittman submitted a blog article on his horizontal curd cutter (https://blog.cheesemaking.com/making-horizontal-curd-cutter/). Until I saw his, I never knew that I needed one. His original cutter had only 1 horizontal element but according to follow-up posts, he added more. Unfortunately I won’t be able to thank Jerry personally ’till I meet him in that great beyond. May God bless & keep you, Jerry.
I began to think of the problem of cutting the curd horizontally. I reasoned that, instead of using copper tubing, I could get a finer cut using 1/8″ stainless steel rod as the cutting element. I was all set to do just that until I saw a Youtube presentation (https://www.youtube.com/watch?v=IsmW_XRXCGg) by Gavin Webber of Australia using a curd cutter made by one of is followers (Dave of Manitoba, Canada).
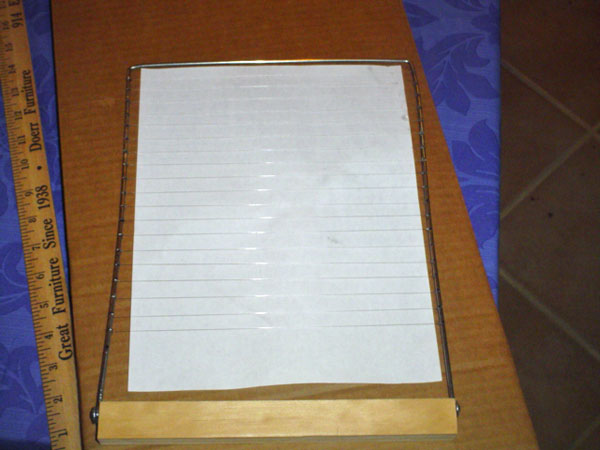
My version pictured here uses a 1/8″ stainless steel rod bent to form the frame, a wooden bar measuring ¾” by 1″ by 8½” to form the handle and 8 lb. test fishing line to form the cutters. The stainless steel frame is notched at 1/2″ intervals from the bottom for 9½.” There is a gap of 1½” between the last string & the handle to allow an easy grip. The strings are knotted at each notch and locked in place with cyclo analine (krazy glue). It is food safe.
The cutter is inserted into the curd, rotated for 1 turn about the center of the pot and withdrawn. Now its time for the vertical cutting.


If it works, send me a cookie, or better yet, a piece of the cheese. Oh heck, how about both.
Good luck! I’d like to see a picture of the rack.
I use a Wilton brand cake cooling rack that has a 1/2″ grid. One twirl and I’m done! Now I’m looking for a cake rack with a larger grid. Wish me luck!
Sorry, I am not a ham operator
The simplicity of the curd cutter makes it possible to have several of them for various curd dimensions. I the primary function of the CA (krazy)glue is to seal the knots & prevent places for germs to hide. It also prevents re spacing the string cutters, along with the notches which allowed the secure, correct spacing in the first place. As sanitation is important, I feel that any design which would allow movement of the string cutters might also compromise sanitation. If you have something in mind, please share it with us.
This… is beautiful.
Based on a previous post, I notice you are out of town and drafting a follow-up to this article. My question, when you can get to it, is: can you adjust the spacing? (I expect not given the krazy glue). Some recipes suggest certain sizes for the curd once cut. While a ladle could be used for the horizontal cuts, I REALLY like the idea you’ve manifested here!
Thank you for sharing your developments!
Yup! Using fishing line here stretched between 2 wood dowels. Wonder if Bob has callsign? Here is AE8G, 80 mtr cw, Fla panhandle. Starting blue cheese process this pm.
Good luck with the cooling rack. My idea was to have the cutting element as thin as possible
Thanks for the additional details. Ever since I saw the curd cutter for home use on Gavin Webber’s website, I’ve intended to make one. Your design has got to be easier to keep clean and sterile. Moving ahead right now.Thanks for the article to get me motivated.
This looks like a wire rack for cooling cookies. Sometimes there are really ‘flimsy’ ones available at the dollar store. Would that work?
I don’t know off hand. If you already have one or can get one esasily, try it & let us know
THAT is EXACTLY what I was thinking – I could just use a cooling rack!
Brilliant!
But even more so, the simplicity of inserting it and giving it ONE turn!
I’m so glad you shared this Bob!
Try a refrigerator grate from small fridge. Most small ones have 1 jack wide grate wires. Instant curd cutter. You can cut out wires fit more space. If you can’t find the spacing you want. Engineers over think every thing.
Nice design, Bob. . I’ve been wanting to make one for years but this is the best I’ve seen. Can you share a bit more details please? Are the notches just for spacing the lines or do they play a role in fastening the monofilament? How did you notch the 1/8″ rod without cutting thru it? You got the lines so straight and taut. Can you describe the knotting process in a bit more detail? My practice lines slip and sag before I can glue them. Thanks, John
The notches were made using a Dremel tool with a cut-off wheel. Their purpose is to provide a location that will hold the string in a fixed location while I am working with the rest of the strings. The CA glue provides to functions: first if permanently fixes the location of the strings no matter what and second, it seals the nooks & crannies within the knots. As to what kind of knot I used, find either a boyscout manual or a Navy manual & look up the “midshipman’s knot”. There isn’t a problem with the first knot as it can easily be pulled tight into the notch. The knot on the other end has to be worked at a little, but the notch helps to keep it located. The lines are just barely taught. As curd is soft, they don’t have to be like banjo strings.
Outstanding solution from a fellow retired electrical engineer! I will shamelessly copy it. Simplicity is the elegance of a design!
Go ahead. Jeri has asked me to do a more detailed write-up. I am planning it now & think the post will look like something out of a woodworking magazine. I’m out of town at this writing, so it won’t be for about another week or two.
Brilliant! Thanks Bob!